How to use Neo
Neo is an AI team that lives on your computer. You say what you want in plain words, and Neo plans it, builds it, tests it and helps you launch it: apps, websites, games, store pages, ads and more.
This guide walks through every screen, button and setting. You do not need to know how to code. If a word in the app is in bold here, that is the exact label you will see on screen.
Never built an app before? Start with New to building apps? Start here. A word you do not know is probably in Words you'll see.
Getting started
What you need
- A Mac with macOS 14 or newer.
- An AI model for Neo to think with. The main way is your own API key: a secret code you get from Anthropic (Claude), OpenAI (ChatGPT), Google (Gemini) or OpenRouter (one key for many models) and paste once. That company bills you for what you use, and the What it costs card shows measured prices before you start: a small mobile app with Claude Sonnet comes to about $0.53 to $0.72. You can also use free models that run on your computer, like Ollama or LM Studio (see Keys and model providers).
- An internet connection for most work. Local models can work offline.
Signing in to the beta
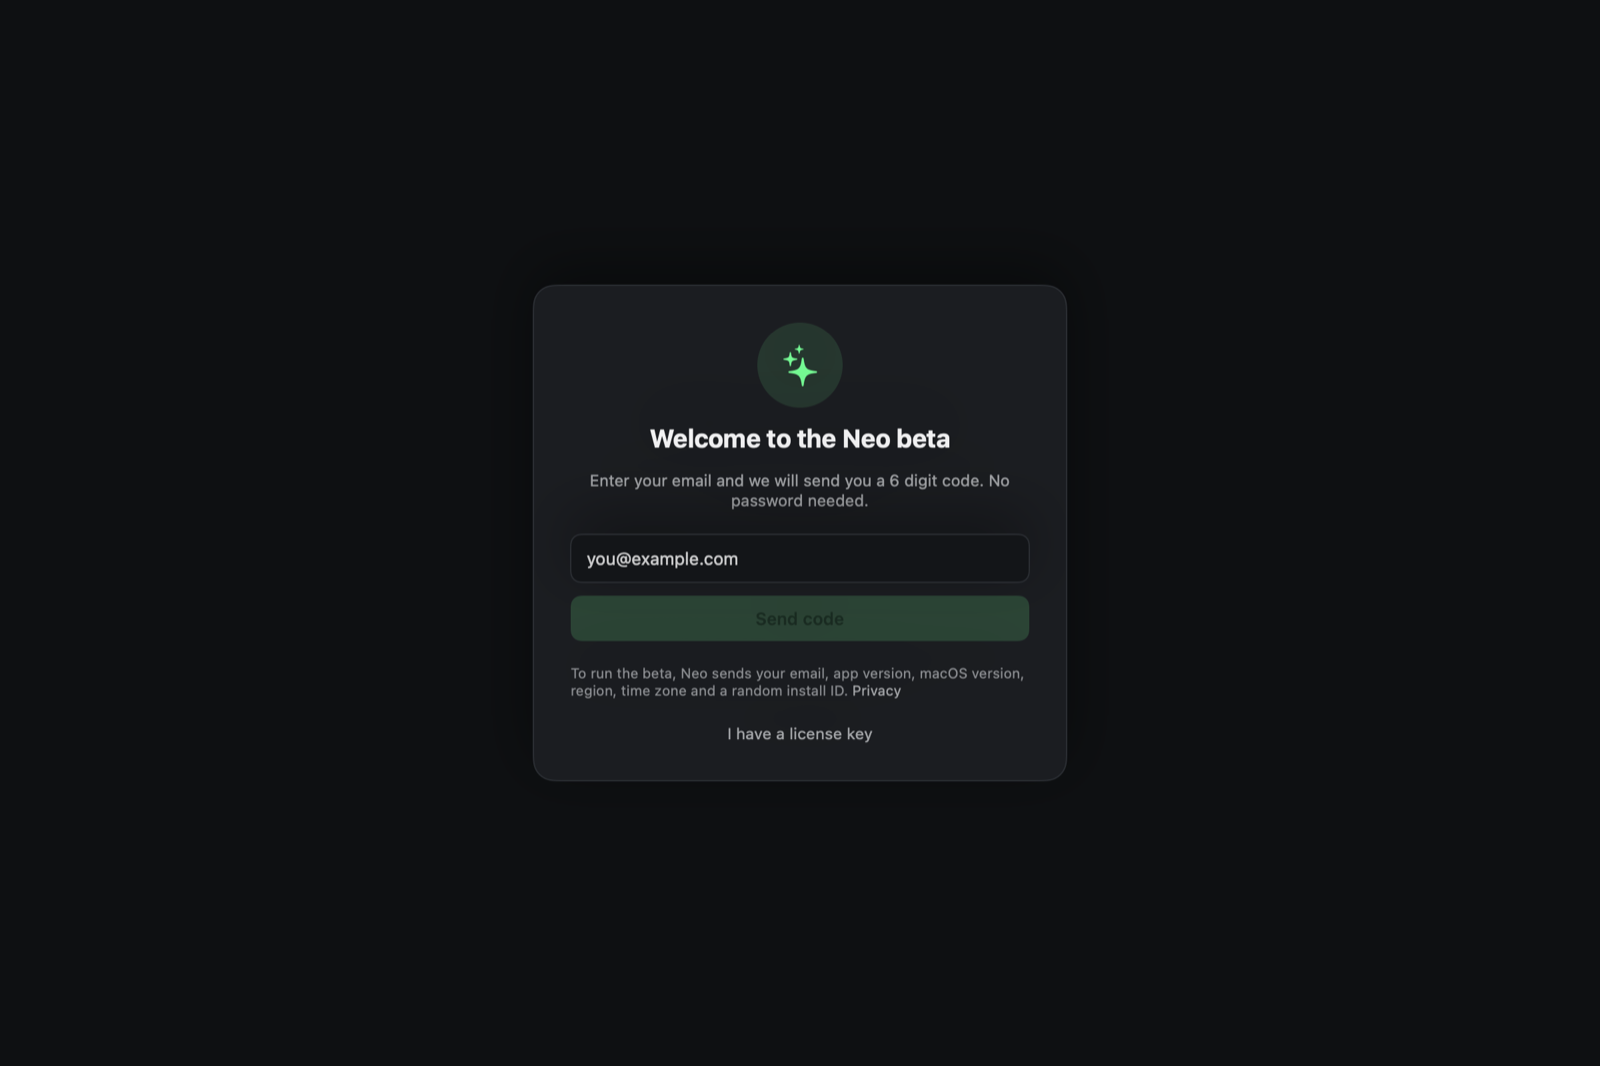
The first time you open Neo, it asks for your email.
- Type your email and press Send code. There is no password.
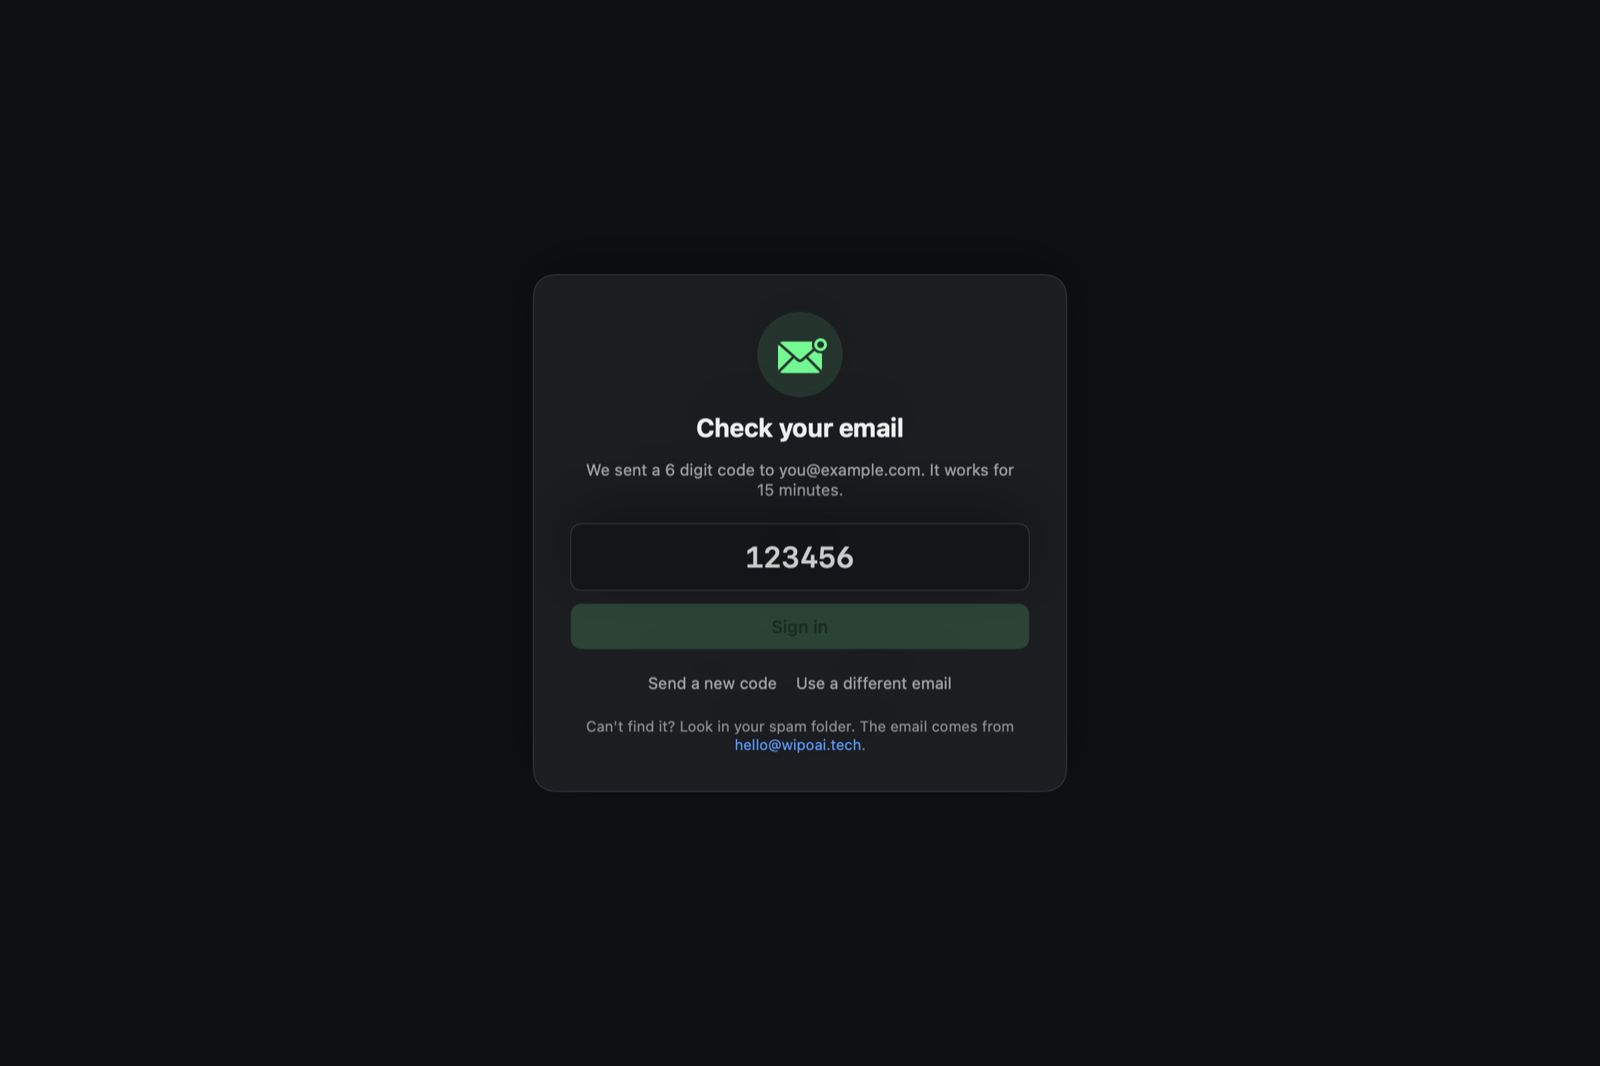
- Check your inbox. The email comes from hello@wipoai.tech. If you cannot find it, look in your spam folder.
- Type the 6 digit code. Neo signs you in by itself after the sixth digit. The code works for 15 minutes.
If the code expired, press Send a new code (you can ask for a new one every 30 seconds). Use a different email takes you back a step. If you were given a licence key instead, press I have a license key and paste it.
If the beta is full for the day, you see You're on the list. We email you when your spot opens. Press I got my invite once it arrives.
The first run: connect your AI and make something
Right after you sign in, Neo walks you through five short pages. Every page has Skip, and you can do any step later.
- Welcome and How it works: what Neo does, in two pages.
- What will you make? Pick websites, apps, games or more. Neo downloads only the tools those need, in the background.
- Which AI should Neo use? Pick one:
- Claude (recommended), ChatGPT or Gemini: each connects with your own API key. Neo shows a short card that says what the key is, where to get it (Open the Claude Console, Open the OpenAI dashboard or Open Google AI Studio) and that the company bills you directly. Paste the key under Paste your key here and press Check and save. Neo asks the company first and saves the key only when it works; you then see Connected with your API key. An AI account, step by step shows every click.
- A key from Claude or OpenAI: the same, with both fields on one page. Press Save key.
- Free AI on this computer: free and private, but a smaller model, so results are simpler and slower. Install the free Ollama app, open it once, then press Use it.
The key card also shows What it costs, with what a small website, app or game really cost in Neo, so you know before you pay anything. If something goes wrong, Neo says what happened and what to do, with a Try again button. You never need the Terminal app.
- Make something now. Pick an idea, such as Make a one page site for my bakery, or type your own, then press Build it. The chat opens and Neo starts building with the AI you just connected. A few minutes later the finished site shows in a live preview. Skip, I'll look around first takes you straight to Neo.
After the first run, a short welcome tour shows where things are.
The Neo window at a glance
The window has three parts:
- The left rail. Chat and Projects at the top (All projects, New project and Add a project you already have), then the groups Create (Game Studio, Sketch, Research, Persona Studio), Discover (Ideas, News, Showroom, Community) and Grow (Marketing, Social Media, Campaigns, Analytics, Sales agents). At the bottom sit Account, Plans and Pricing, Usage and Cost, API keys and Connect, Help and setup and All settings. The Advanced group (Agents, Team builder, Pipeline) shows once you turn on Show the Advanced group in Settings, Modules and tools. Hover over an item to see what it is for. Press ⌘\ or the sidebar button in the top bar to make the rail narrow (icons only) or wide again.
- The chat column. The chat is always there, next to whatever screen you have open. This is where you ask Neo for things.
- The canvas. The big area on the right shows the screen you picked in the rail, or the work Neo is doing.
The top bar has the project picker in the middle, and on the right a small status line, the ⌘K button for the Command palette (type the name of any screen or action to jump to it) and a ? button that opens this guide.
A small dot next to the Neo logo shows whether Neo's engine on your computer is running: green means Connected, red means Offline.
Your first 10 minutes
- Connect your AI (2 minutes). On first launch Neo shows a short welcome. On the Which AI should Neo use? page, pick Claude, open the Claude Console from the card, make a key there and paste it into Neo, then press Check and save (a key is a long secret code; An AI account, step by step shows every click). ChatGPT and Gemini work the same way. No key yet? Free AI on this computer works without one. You can do this later in Settings, API Keys, under Your AI. See The first run.
- Ask for something small (1 minute). Click in the chat box and type, for example: Make a one page website for a dog walking business called Happy Paws. Press Return.
- Make the choices (1 minute). Neo shows a card with its suggestions: the kind of site, the look, the colours, the sections. Neo's picks are marked. Change anything you like, then press Build this.
- Watch it work (3 to 5 minutes). A step list shows what Neo is doing now. The finished site opens in a live preview on the right.
- Ask for changes (1 minute). Type what you want different, in plain words: Make the header green and add a price list.
- Find your files. Open Projects on the rail. Every project has Show in Finder and Copy path.
That is the whole loop: ask, choose, watch, refine. Everything else in Neo is a way to do more of it, or to launch what you built.
Quick Start
Quick Start (type its name in the Command palette, ⌘K) is the shortest way to a first build. Under What do you want to build? describe it in a sentence, or press one of the examples (such as Portfolio website) to fill it in. Where should it be deployed? picks where the result goes. Keep it on this computer if you are not sure; the others put it online (GitHub Pages, Vercel), send an iPhone app to testers (TestFlight) or email it, and each needs an account (see Other accounts you may meet). Some ask for one more detail, like a name for the project on GitHub. Press Create: Neo makes the project and starts building, and Open Project takes you to it when it is done. For anything bigger, the chat gives you more choices along the way.
The Setup Guide
Help and setup at the bottom of the rail (also Help, Neo Setup Guide, ⇧⌘/) has one page per outside service: AI models, design and 3D, video, hosting, backends, payments, notifications and game stores. Search guides... at the top finds a page. Each page says Configured or Not Set Up at the top right, lists what Neo checked for you, and walks through getting the key or account step by step. Start with Getting Started, then How to Get Your API Keys, which shows where each AI company's key comes from.
Where to get help
- Help, Neo Guide in the menu bar, or the ? button in the top bar, opens this guide. It is also online at neotheapp.com/docs.
- Help, Neo Setup Guide (⇧⌘/) has step by step pages for connecting each outside service, and checks what is already set up.
- Help, Send Feedback… in the menu bar tells us what is broken or missing (see Feedback).
- When something goes wrong, Neo shows a problem card: one sentence for what happened, one for what to do now and one button, such as Try again, Open settings or Ask Neo to fix it. The technical text waits behind Details, with Copy.
New to building apps? Start here
You do not need to know how to code, and you do not need to know what words like repository, deploy or API key mean. This part explains what Neo does for you, what you do, and what costs money. Words you have not seen before are explained in Words you'll see.
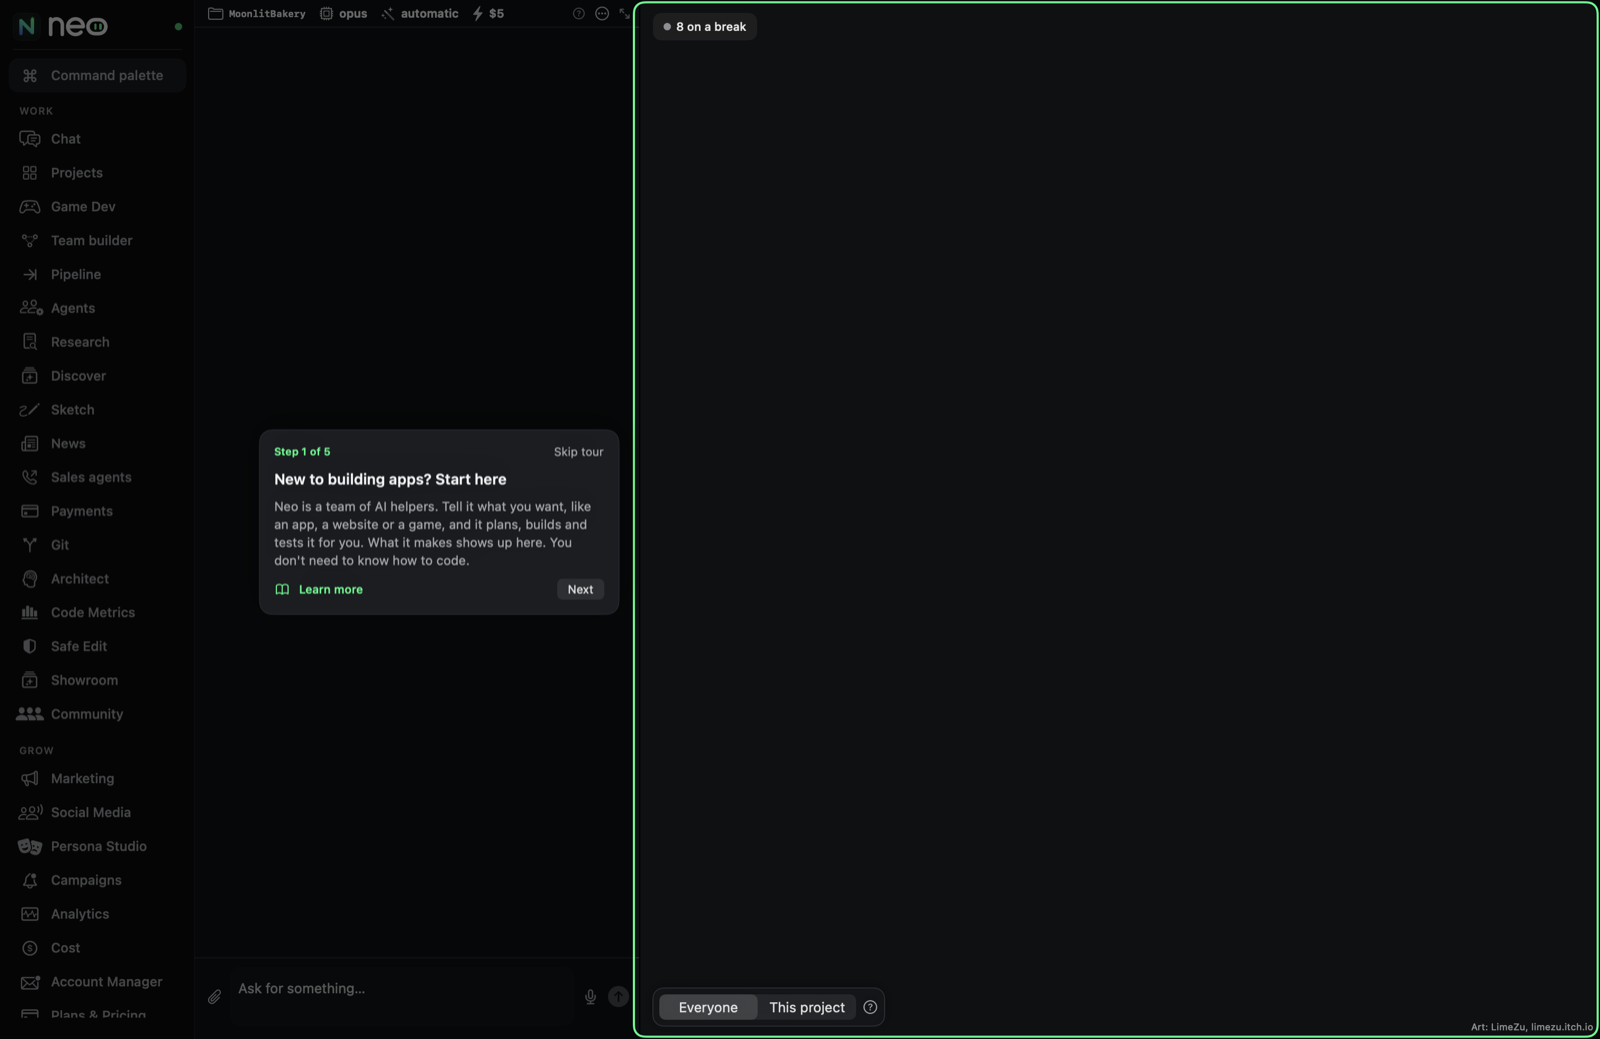
The first time you open Neo, five short cards walk you through the same things. Press Skip tour to close them, or Help, Welcome Tour in the menu bar to see them again.
What Neo does for you
Neo is a team of AI helpers that lives on your computer. You say what you want, and Neo:
- Plans it. It works out the screens, the look and the parts it needs, and shows you a card with its suggestions.
- Builds it. It writes the code, makes the pictures and puts the files in a folder on your computer.
- Tests it. It opens what it built, clicks through it and fixes what does not work.
- Shows it to you. The result opens on the right of the window, running for real.
- Helps you launch it, when you ask: a website online, an app ready for the stores, posts and ads. Anything public waits for your OK.
How to ask
Type in the chat box the way you would tell a friend. You do not need special words.
- Make a one page website for my bakery, Moonlit Bakery, with opening hours and a preorder form.
- A jumping game with a fox who collects lanterns.
- An iPhone app where I write down which plants I watered.
Neo asks about anything it needs. When it shows a card with choices, its own picks are marked: keep them if you are not sure. To change something later, just say so: make the header green, add a price list, the fox should jump higher.
You never pick a module or a tool yourself. Neo reads your message and hands it to the right part of Neo.
What costs money, and how the budget protects you
- The AI that does the thinking. Neo uses your own API key for Claude, ChatGPT or Gemini (the company that makes the AI bills you for what you use, and you can set a monthly spend limit on its site), or a free model that runs on this computer. See Keys and model providers.
- Some outside services cost money: making pictures and video with paid services, phone calls, an Apple developer account for the App Store. Neo tells you before it uses one.
- Hosting a website can be free: Vercel, Cloudflare Pages and GitHub Pages all have free plans.
How Neo keeps spending under control:
- The chip above the chat box says Asks or Autonomous. On Asks, anything paid, anything that deletes and anything public waits for your OK, with its price on the card.
- On Autonomous, Neo keeps going within the budget and time cap you set on the same chip. The budget counts real money: the paid tools, and the AI model's own work on your API key. When a task ends, a short line says about what it cost on your key, for example about $0.42 · Opus. The default budget is $10; Neo tells you at 50 % and 80 %, and stops cleanly after the current step when the budget is used up. See Long chats and what they cost.
- Putting things online, posting and sending email always ask, in both modes.
- Monthly budget for Claude on your key in Settings, API Keys makes Neo ask before a message that would go past it.
- Usage and Cost at the bottom of the rail shows what was spent, by day and by job.
What Neo does by itself, so you do not have to
- Saves versions. In projects Neo makes, it saves a version after each step, and before every task it takes a snapshot you can go back to (see Safe Edit). You never need to learn Git, but Git and GitHub, for beginners explains it if you are curious.
- Picks the tools. The right module, the AI for each job and the way to build your kind of project.
- Tests before it shows you. Builds are opened and checked before Neo says they are done.
- Keeps long chats going. A long chat costs more, because the AI rereads the whole conversation at every step. When a chat gets long, Neo starts a fresh page with a summary of what matters by itself and carries on, so you never have to start over. See Long chats and what they cost.
- Asks for an account only when it needs one. If a step needs an outside account (a place to put your site online, for example), Neo says so at that moment and shows the steps. See Other accounts you may meet.
Where help lives
- The ? at the top right opens this guide. Help in the menu bar has it too.
- Each screen's own ? (in the bar above the screen) replays its short tour.
- Ask the chat. Type how do I put my site online? or what is a repository? and Neo answers from this guide, with a button that opens the right part.
- Help and setup at the bottom of the rail walks through each outside service step by step and checks what is already set up.
- Help, Send Feedback… in the menu bar tells us what is broken or confusing.
Words you'll see
Short, plain meanings of the words Neo and other services use. You do not need to learn them: Neo handles most of these for you.
- Account (outside account). A sign in with another company, like GitHub or Vercel, that Neo uses for you. Most have a free plan.
- Agent. One AI helper with one job, like writing code or testing. Neo's agents work together as a team.
- AI model. The AI that does the thinking, like Claude or GPT. Different models are faster, cheaper or smarter.
- API key. A long secret code an AI company or other service gives you, so Neo can use that service as you. Keep it private, like a password. See An AI account, step by step.
- App Store Connect. Apple's website for putting apps in the App Store. It needs a paid Apple developer account.
- Asks and Autonomous. How freely Neo works. Asks checks with you before anything paid, destructive or public. Autonomous keeps going within your budget.
- Backend. The part of an app that lives online instead of on the phone: accounts, saved data, sign in.
- Branch. A separate copy of your project for trying an idea, without touching the normal copy (called main).
- Budget. The most one request may spend, the AI model's work and paid tools together. You set it on the chip above the chat box.
- Build. Turning the code into something that runs: an app, a site or a game. Also the result itself.
- Checkpoint (snapshot). A saved copy of the whole project from a moment in time, so you can go back to it.
- Command line tools. Apple's free set of tools (Git is one of them) that Neo needs for some jobs. Neo opens Apple's installer for you.
- Commit. One saved version of your project, with a short note saying what changed.
- Database. Where an app keeps its information, like users, orders or saved recipes.
- Deploy (publish). Putting your site or app online so other people can use it. Neo always asks first.
- Diff. The lines that changed in a file, old and new side by side.
- Domain. A website address, like moonlitbakery.com. Hosting services give you a free one, like moonlit-bakery.vercel.app.
- Game engine. The free program Neo uses to build and run games. Neo can install it for you.
- Git. A tool that keeps every saved version of a project. See Git and GitHub, for beginners.
- GitHub. A free website that keeps a copy of your project online. Optional.
- Hosting. A company that keeps your website online, like Vercel, Cloudflare Pages or GitHub Pages.
- Live preview. Your project running right inside Neo while it is being built.
- Local model. An AI that runs on this computer instead of online. Free and private, but slower and simpler.
- Module. One part of Neo, like Game Studio, Marketing or Git. Neo picks the right one from your message.
- Pipeline. A list of steps that run one after another, like plan, design, build, test and launch.
- Project. One thing you make (an app, a site, a game), with its own folder of files.
- Provider. The company behind an AI model or a service, like Anthropic (Claude) or OpenAI (ChatGPT).
- Pull. Bringing in versions saved somewhere else, like on GitHub or your other computer.
- Pull request (PR). On GitHub, asking for a branch to be merged into main, so someone can look first. Most solo projects never need one.
- Push. Sending your saved versions to your copy on GitHub. Neo never pushes without asking.
- Repository (repo). A project's saved history: every version of every file. On GitHub, also the online copy.
- Server. A computer that answers requests. Neo runs a small one on this computer for its own work.
- Spend limit. The most an AI company may charge your API key in a month. You set it on the company's own site; Neo's key card says where.
- Stage. Picking which changed files go into the next saved version (commit).
- Stash. Putting unfinished changes aside for a moment, to bring them back later.
- Supabase. A service with a free plan that gives an app a database and sign in. See A place to save your app's data.
- TestFlight. Apple's way of letting testers install your app before it is in the App Store.
- Token. Two meanings. A key (like a GitHub token or an API token). Or a small piece of text an AI reads and writes, which is how AI use is measured and priced.
- Vercel. A hosting service with a free plan that puts websites online. See Putting a website online.
The chat
Neo has one chat for everything. You do not have to open the right screen first: tell the chat what you want and it picks the right part of Neo (a module) for the job. Building an iPhone app, drawing a game character, writing an App Store page and planning ads all start here.
Two sizes
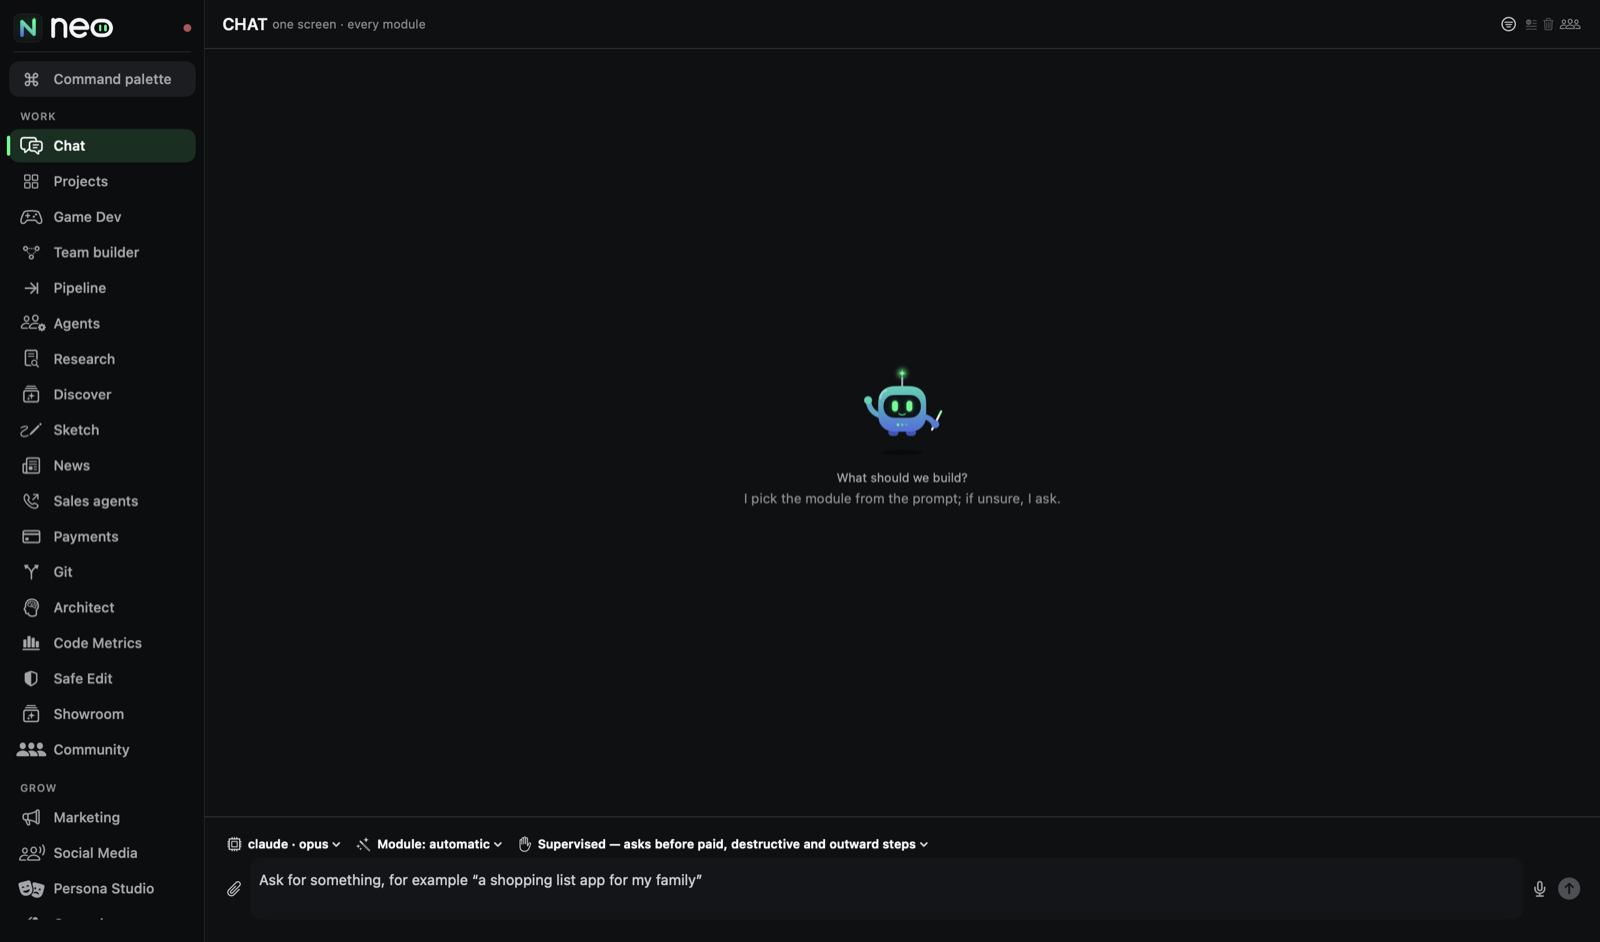
The chat lives in the column next to the canvas. To give it the whole canvas, press the expand button at the top of the column, or click Chat on the rail. Click Chat again, or press to column, to send it back. It is the same conversation in both places.
On the whole canvas the chat's header has a few extra tools:
- Filter shows everything, only Neo's pipeline, only Claude or Codex replies, or only the problems.
- Compact history shortens a long conversation into a summary; nothing is thrown away.
- Delete history… clears the conversation, and asks first.
- The people button opens the Team builder.
Writing a message
- The box. Type what you want in your own words. In the full view it says Ask for something, for example "a shopping list app for my family". Press Return or the arrow button to send.
- Attach (the paperclip). Add file… or Add image… gives Neo a file to work with: a sketch, a logo, a screenshot of a bug, a document. Attached files show as small chips above the box; click the x to remove one.
- The microphone. Click it and talk. Your words appear in the box while you speak, and when you pause Neo writes them down again more carefully and puts the better text in their place. Click the microphone again or press Esc to stop. You can also hold the microphone and talk while you press it. ⇧⌘D starts and stops it from the keyboard. Nothing is sent until you check the text and press send. The line under the box says which language Neo heard and how long writing it down took, for example Türkçe · 2.1 s · check, then send. The switches are under the small arrow next to the microphone (right clicking the microphone shows them too):
- Keep listening keeps the microphone on when you pause, so you can talk sentence after sentence without clicking each time. Click the microphone or press Esc to stop. After two quiet minutes it stops by itself.
- Listen when I say "Hey Neo" lets you start without touching the computer: say Hey Neo, then what you want. A small green dot on the microphone means Neo is listening for those two words on this computer. Beta.
- Auto-send (approval cards still stop) sends the text by itself when you pause. Only the finished text is sent, never the words that appear while you are still talking.
- Online speech recognition sends your voice to an online service to be written down. Off (the default), your voice stays on this computer.
- Voice and privacy. The words that appear while you speak come from the computer's own speech recognition, which runs on this computer; the first time, it asks for permission to use it. If you say no, everything still works: the text just comes when you pause. Recordings are not kept.
- Sending while Neo works. If you send a message while a turn is still running, it waits as Queued and starts when the running turn finishes. Click its x to take it out of the queue.
- Nothing starts by itself. Picking or opening a project never starts work. If a message was still waiting from before, Neo shows Neo has a next step ready with Start and Not now, and it runs only when you press Start. On a project you froze (see Projects), Neo asks before any message runs there.
The chips above the box
A row of chips shows how your next message will run. Click any chip to change it.
- Project. Which project Neo works on. It reads pick a project when none is chosen. See Projects.
- Model. Which AI does the thinking, for example claude · opus. The menu lists Neo (agent pipeline), then each provider you connected with its models, then Your model providers (the extra providers from API keys and Connect).
- Module. Shows Module: automatic by default, which means Neo picks the module from your message. The menu lists Automatic (from the prompt) and every module with how many tools it has. Pick one to force it.
- Run mode. Supervised or Autonomous. See Run mode, budget and time cap.
- Team. Shows Team: name when you started a team from the Team builder. Work without the team goes back to a single model.
Neo has 19 modules: Game Dev, Apps, Web, Code & repo, Backend & database, Deploy & hosting, App Store & ASO, Influencer (Persona), Ads & social, In-app ads, Push & email, Analytics & sales, Payments & licensing, Media & gallery, Flows & approvals, Tasks & team, Agents, models & training, Voice console and Settings & system.
If Neo cannot tell which module you mean (for example you typed fix this), it shows a Which module? card with a few buttons. Click one and the turn runs there.
What you see while Neo works
Every answer comes in a card. At the top it shows the module, the model and the status: running… while it works, then how long it took.
- The step list. A title (for example Working on it), a count like 3/5, a progress bar and the steps. Each step shows as not started, in progress, done, failed or waiting. Press Show the steps or Hide the steps to open or fold the list.
- Build stages. When Neo builds something, the card follows these stages: Plan, Writing, Pictures, Building, Wording check, Test and film, Delivery. A line tells you what comes next.
- What it is doing now. A short line such as Thinking it through or Writing the code.
- Show details / Hide details. Opens the full answer and the technical details.
- Produced in this turn. Pictures, sounds and files Neo made show as small cards under the answer.
- What this changed. When a run ends, a card lists what it changed, each with a button that takes you there: See on the map, Open in Scene editor, Play from here, See in Levels, Open in Assets or See the change. The project page's Runs tab shows the same list for older runs.
- What it cost. On your own API key a short line says about what the task cost, for example about $0.42 · Opus.
- Preview. For sites and apps you see What Neo sees, the Latest view, and Watch how it was built, a short film of the build.
If a run stops before it is done, the card says This run stopped before it was done and offers Try again. When something goes wrong you never see a raw error: a problem card says in one sentence what happened, in one what to do now, and has one button (for example Sign in, Open settings or Ask Neo to fix it). Details shows the technical text if you want to send it to us.
Stop
While a turn runs, a red Stop button sits next to the box. It stops the turn after its current step, so nothing is left half written. The card then says Stopping after the current step… and later stopped.
Open in panel
When Neo makes something for a screen (a game sprite, a pipeline, a site preview), its card offers Open in panel. Click it and the canvas switches to that screen. A small dot on a rail item also means New work from the chat is waiting there.
If you would rather have the canvas follow Neo automatically, turn on Follow the work in the panel in Settings, Appearance. Then the canvas switches to the module as soon as a turn starts.
Choices cards
Before a bigger build, Neo shows a choices card: Neo's picks are marked. Change anything, then build. Each group (for example What kind of app, Look, Accent colours, Features) has option pills. Pills marked Neo are its suggestion; pills marked Beta are newer options. Some groups let you pick several. Your colours… opens a colour picker; press Use these colours to keep them.
If a choice needs an account Neo is not connected to yet (a hosting service, for example), the card asks for those details right there and stores them only on this computer.
Press Build this to start. The card then says Building with these choices.
Approval cards
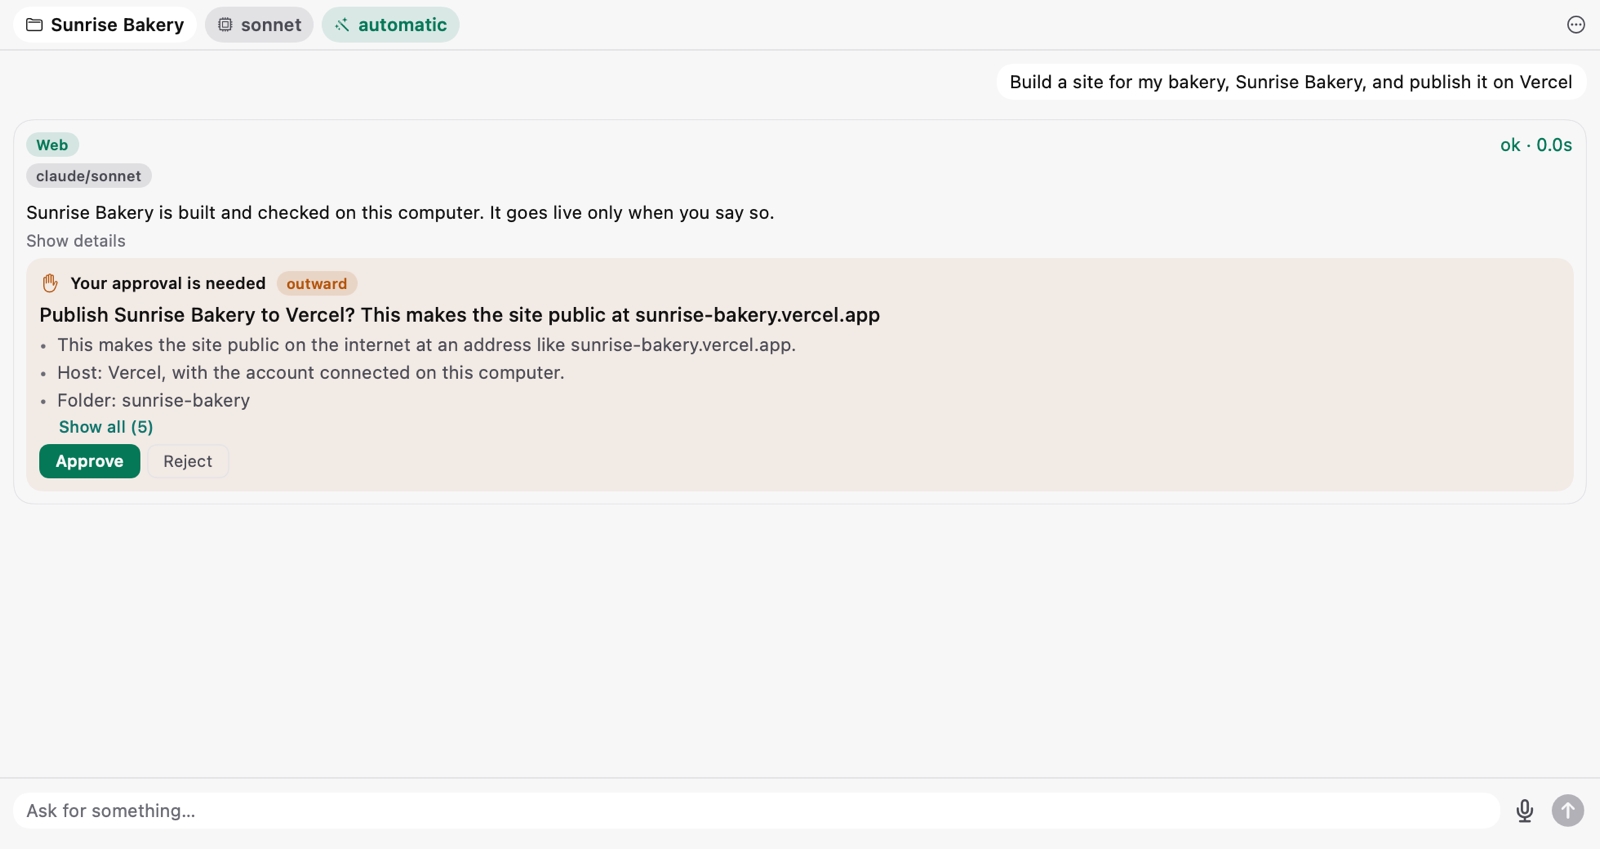
Neo never spends your money, publishes, posts, emails or calls anyone without asking first (unless you allowed paid steps in Autonomous mode, and even then publishing, posting and emailing still ask). When it needs your OK you see Your approval is needed with:
- one plain sentence about what Neo wants to do, for example Publish Sunrise Bakery to Vercel? This makes the site public.
- the details as a short list (Show all opens the rest),
- what it will cost, when the step costs money,
- Approve and Reject.
Nothing happens until you answer. After you answer the card says You approved or You said no, and then how it went: for a site, Publishing…, Published. with Open site, or Could not publish. with Try again. If you rejected it, nothing ran and nothing was spent.
Which game should Neo work on?
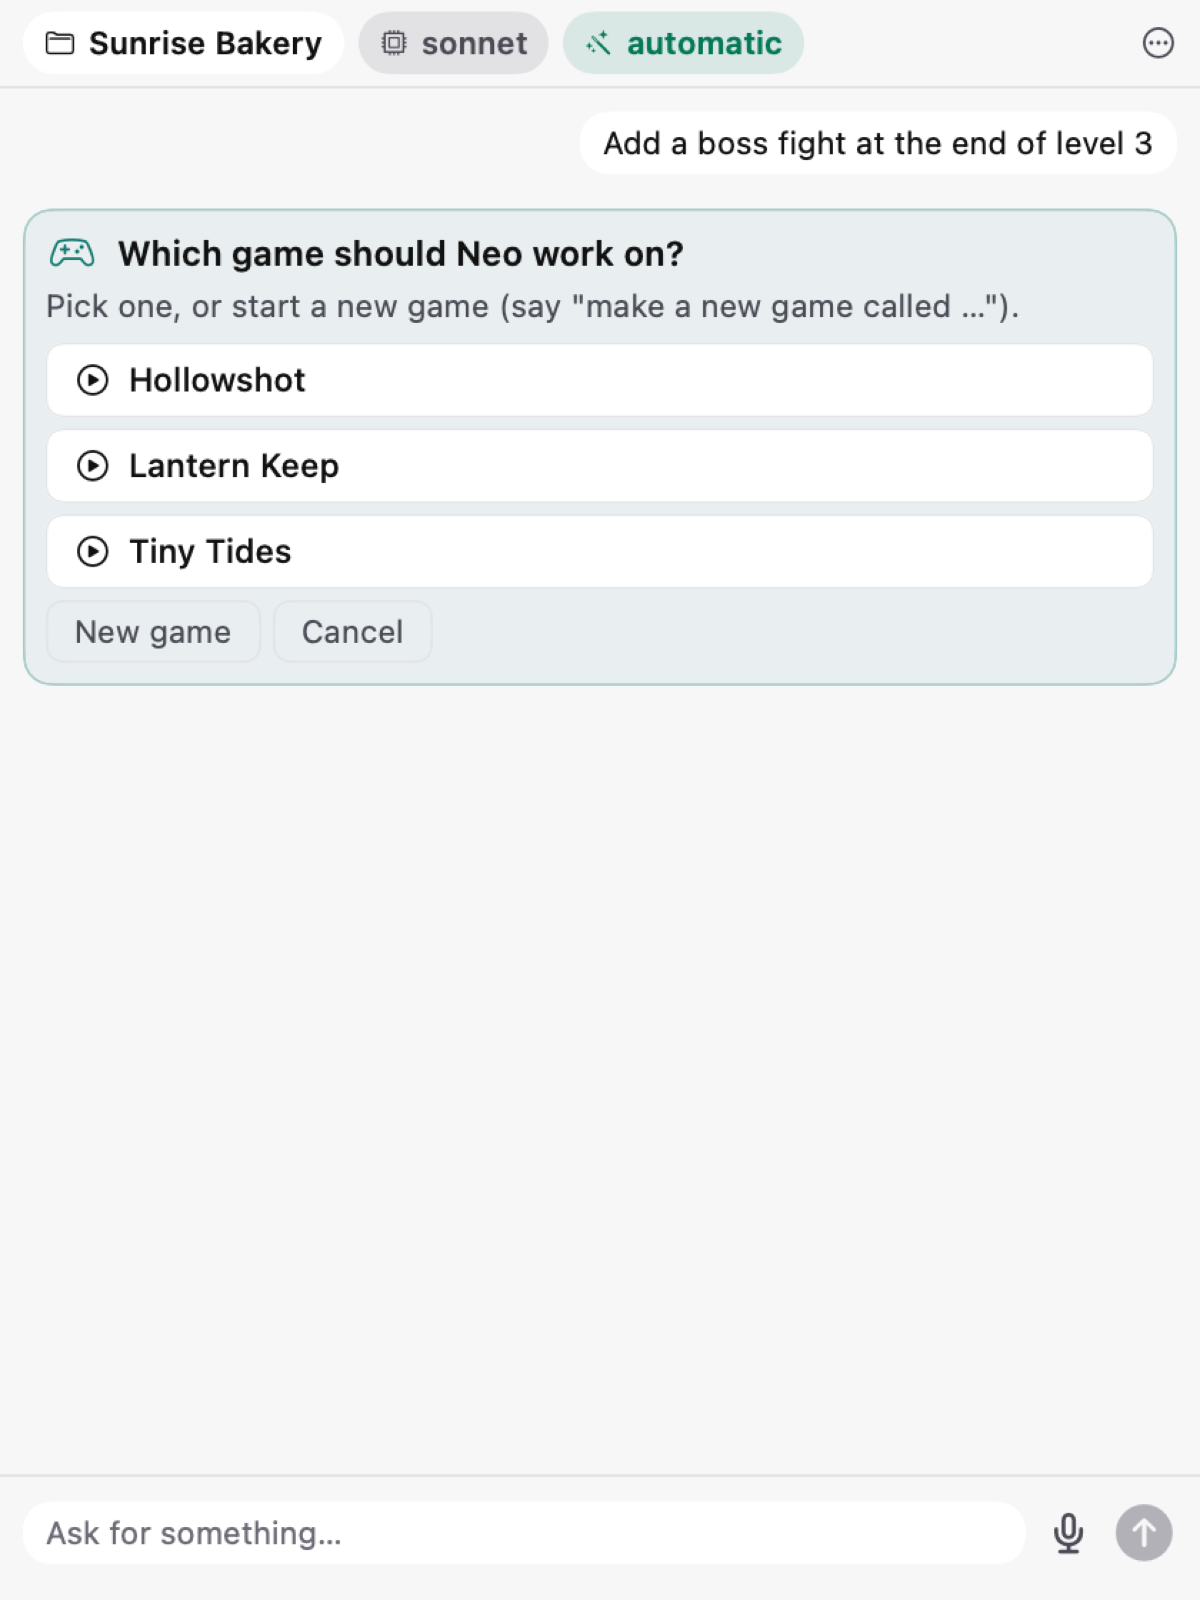
If you ask for game work and no game is selected, Neo asks Which game should Neo work on? with a button for each of your games. Pick one and your message runs on it. If you have no game yet, press Create a new game to open the New project window with Game already chosen, or Cancel.
The chat's own tools
At the top of the chat (in the column, under the ⋯ menu):
- Show filters the conversation: All, Neo agent pipeline, Claude / Codex or Problems.
- Compact history summarizes a long conversation and carries on fresh with the summary. Nothing is deleted.
- Delete history… clears this project's chat after you confirm. Each project keeps its own chat history.
- Team lets you add, inspect and remove the agents working with you.
Run mode, budget and time cap
The run mode chip decides how much Neo may do without asking.
- Supervised (the default). The chip reads Asks in the column. Neo asks before paid, destructive and outward steps: anything that costs money, deletes or overwrites, or leaves your computer.
- Autonomous. Neo keeps going within a budget and a time cap. Paid tools run within the budget, a checkpoint is saved before anything destructive (so you can undo it), and small choices are made and written down instead of asked. Publishing, posting and emailing always ask, even in Autonomous mode.
In the same menu you set two limits for Autonomous runs:
- Budget per run (AI model and paid tools): $2, $5, $10, $25 or $50. The default is $10.
- Time cap: 30, 60, 120 or 240 minutes, or No cap. The default is 60 minutes.
The chip then reads, for example, Autonomous · $10 · 60 min. During an Autonomous run the card tells you what was approved automatically and how much of the budget is spent, shows each Checkpoint with a Restore button, and lists the Decisions it made instead of asking. When the time runs out it says so and stops.
Each answer card shows a small badge, asks first or keeps going. Click it to change the mode for your next message.
Long chats and what they cost
What model cost is. Every time Neo's AI model takes a step (reads a file, runs a command, looks at a picture, writes a reply), it reads the conversation so far and writes a little. Your model provider counts those words, and that is the model cost. Paid tools, like image or video generation, cost extra on top.
Why long chats cost more. The model rereads the whole conversation at every step. Early on that is cheap. After a long day in one chat it can be hundreds of pages, reread on every step. In one game chat we measured, a single answer cost about $8, and almost all of it was the model rereading its own history. The same work on a short conversation costs a fraction of that.
Neo starts a fresh page for you. When a chat gets long, Neo writes a summary and carries on in a fresh conversation with it. You do not need to do anything. The chat shows one quiet line: "This conversation got long, so Neo started a fresh page with a summary. Nothing was lost." Click See the summary to read what was carried over: your goals, every decision you wrote (in your own words), the files made so far, what is still open and the notes to read first. The summary is also saved in your project, and the full earlier turns stay in the chat history. If one task runs very long on its own, the agent may also tidy its notes in the middle of the task; the chat says so, and nothing is lost then either.
On your API key: what it costs. Neo runs Claude, ChatGPT and Gemini on your own key, and that company bills you by use. Each running task shows what it has spent so far, split in two, for example $3.10, model $2.80 + tools $0.30, and a finished task ends with one line such as about $0.42 · Opus. For ChatGPT and Gemini the line counts the words used, because the company sets the price. Settings, API Keys shows what your keys cost this month per project, and Monthly budget for Claude on your key makes Neo ask (Send anyway or Not now) before a message that would go past it. Set a monthly spend limit on the company's site too, so you never pay more than you plan to.
How the budget works. In Autonomous mode the budget guards real money: the model on an API key and the paid tools. Neo tells you quietly when half of it is used and clearly at 80 %. When the budget runs out during a step, Neo stops the task after that step and says why; raise the budget and send a message to go on. Some models only report their use when a turn ends; then you get one line with the final state, and if the turn already went past the budget, the line says the turn had finished and that Neo starts nothing more for it. In Supervised mode nothing stops on cost: the task card simply shows what was spent.
Doing more for less. Neo already hands simple, repetitive steps (running scripts, moving files, renders, measurements) to a cheaper model and keeps planning and review on the model you picked. In Game Studio, Sonnet handles most everyday building well for about half of Opus's price per word; ask the chat "which model should I use?" to see the suggestion. Opus stays one click away for big design decisions and hard bugs.
Projects
A project is one thing you are making: an app, a site, a game, a document. Neo keeps each project's files, chat history, team and pipeline together.
Picking a project
The project picker sits in the middle of the top bar (Choose a project when none is open), and again as the first chip above the chat box. Its menu shows your recent projects with their kind and platforms, then:
- All projects… opens the full list.
- Add a project you already have (also on the rail under Projects, File in the menu bar, ⇧⌘O, or drop a folder on Neo) adds a project you made somewhere else. Neo looks at the folder and shows What Neo found: the kind of project, and under What Neo can do with it today and Not yet which screens will work, for example the levels, the World map and the scenes of a game, or the App map of an app. Give it a Name in Neo and press Add this project. The folder is not copied or moved, and Remove from Neo never deletes your files.
- New project starts the new project flow (also ⌘N, or File, New Project).
You do not always need a project first. When you ask the chat for something new, Neo can make the project for you.
New project, in three steps
- What are we making? Pick one: App, Game, Site, Backend, Bot, Extension, ML, Research, Content, Document or Studio.
- Where will it run? (you can pick several) For example iOS, Android, macOS, web, Windows, Linux, Steam or console.
- What will it be made with? The choices depend on step 1. For a game they include Neo engine (Neo's own, for 2D and 3D), Unity, Unreal, SpriteKit, SwiftUI, Phaser, Bevy and LÖVE. Give it a Project name here. Choose a folder… decides where its files go; if you skip it, Neo makes a folder for you.
Press Next to move on and Create at the end. Cancel closes the window without making anything.
The Projects screen
Click Projects on the rail. You see all your projects with a search box (Search projects...). Search looks at the name, the folder and the description. Click a project to open its page. Right click a project for Open, Project team, Project pipeline, Archive, Edit, Project Settings, Open in Finder and Delete.
- The chips All, App, Game, Site and No kind show one kind at a time. No kind lists projects Neo cannot place yet; give each a kind so the right modules open for it.
- The two buttons on the right switch between a grid of cards and a list with kind, status and last activity in columns. The list can be grouped By kind or By status.
- New project starts the three step flow above.
A project's page (the hub)
A project's page has tabs: Overview, Campaigns, Personas, Content & video, Assets, Releases, Runs and Settings. Each tab shows how many items it holds.
- Overview: the counts at a glance, the project's sales agents, its Brand kit (tone, audience, colours and a tagline that the ads, scripts and posts Neo writes follow), and its kind, platforms, engine and status. Press Save after a change. Freeze this project (under Frozen) is for a finished project: Neo never starts work on it by itself, and asks before any message you send there runs.
- Campaigns, Personas, Content & video and Assets: what was made for this project, each line with where it came from (the chat or the pipeline), its status and when. The button at the top opens the right module with this project already picked, so new work lands here.
- Releases: the versions that were prepared or shipped. Neo prepares a store upload; you send it from the store's own site.
- Runs: every chat task and pipeline run on this project. What it changed on a run opens each thing it touched: a level on the map, a scene, a screen, a picture or the code. A run still going can be paused or redirected on the Agents screen.
- Settings: Open the project settings for deploy channels, approvals and keys that belong to this project only.
The header has Show in Finder, Copy path, Project team and Project pipeline. The arrow at the top left goes back to all projects.
For example, a bakery site called Moonlit Bakery could show 2 campaigns, 1 persona and 14 runs, with the brand kit set to a warm, friendly tone and the tagline Fresh at dawn.
Where your files live
Everything Neo makes is a normal file on this computer.
- Show in Finder on a project's page opens its folder.
- Copy path copies the folder's full location, so you can paste it into Terminal or another app.
- A project lives in the folder you chose. If you did not choose one, Neo makes a folder named after the project.
- Work the chat does before it has a project goes into Neo's own data folder,
~/.neo(a hidden folder in your home folder). Each chat turn's results are there too, with their previews and build films.
In the chat, file locations show from your home folder, like ~/…, never with your user name. If you record your screen, turn on Hide file paths (for screen recordings) in Settings, Appearance; every path then reads as (a file on this computer).
The .neo folder inside a project
Inside each project folder Neo keeps one hidden folder called .neo. It holds Neo's own working files: its notes about the project, backups made before an edit, logs and build leftovers. It is never part of your app:
- It is kept out of git, so it never lands in your repository.
- It is left out of deploys, exports and store packages.
- You can delete it safely. Neo makes a fresh one next time, but you lose the undo backups inside it.
Building things
Most work starts in the chat. The modules below are what the chat uses behind the scenes. Each section says what to type, what you will see, and what you need.
Apps: iPhone, Mac, Android and React Native
What it does. Builds apps: screens, features, design, app icon, builds and fixes. Neo runs the app, tests it and films it, so you see it working before you decide anything.
How to start. Say what the app is for and, if you care, where it runs. Neo reads the platform from your words:
| You write | Neo builds |
|---|---|
| an iPhone app, an iOS app, SwiftUI | an iPhone app (SwiftUI) |
| a Mac app, a desktop app | a Mac app |
| an Android app | an Android app (Kotlin and Jetpack Compose) |
| React Native, Expo, cross platform, iOS and Android | one app for both phones (React Native and Expo) |
If you do not name a platform, Neo builds for iPhone.
The choices card. You get a card titled Your app, Neo's suggestion (or Your cross-platform app, Your desktop app) with groups such as What kind of app, Look, Accent colours, Features (pick several) and App icon and pictures. iPhone apps also ask Runs on: iPhone or iPhone + iPad. React Native apps ask iPhone + Android (the default), iPhone only or Android only. Press Build this.
Where it runs. iPhone apps open in the iPhone simulator on this computer. Mac apps open right here too. You can keep asking for changes in the chat.
Good to know.
- Building iPhone and Mac apps needs Apple's Xcode, free from the Mac App Store. Android needs Android Studio's tools. Help and setup shows what is missing.
- Putting an app on the App Store or Google Play needs your own Apple or Google developer account. See Store pages and ASO.
- Flutter and Kotlin Multiplatform are not supported yet. Mac apps are built for the Mac today; Windows and Linux desktop builds come later.
Web: websites and web apps
What it does. Builds websites and web apps: landing pages, shops, portfolios, booking pages. You watch the site in a live Product preview while Neo works, and you can publish it when you are happy.
How to start. Make a website for my bakery with a menu, opening hours and a contact form.
The choices card. Your website, Neo's suggestion asks What kind of site, Built with (Neo recommends a static site for a first site: it ships today and hosts anywhere), Look, Colours, Sections and Pictures, plus data, payments and hosting when they apply. One section option is Call me: visitors leave their number and an AI caller rings them back (see Sales agents).
Publishing. Publishing makes the site public, so Neo always shows an approval card first. It needs an account with a hosting company (Vercel, Cloudflare Pages or Netlify, all with a free plan). The first time, the card asks for it and shows what to paste; Putting a website online has the steps. After Approve the card shows Published. and Open site.
Backend and database
What it does. Sets up the part of an app that lives online instead of on the phone: where it saves things (the database, like accounts or saved recipes), who may read and change them, and sign in. Neo suggests Supabase, which has a free plan; it also works with Neon, Firebase, PocketBase, Nhost and Upstash.
How to start. Add sign in and a database for saved recipes to my app, using Supabase. There is no separate screen for this module; everything happens in the chat.
Good to know. You use your own account with the database service. The first time, Neo asks for it and shows what to paste (A place to save your app's data has the steps). Neo asks before it changes anything that already holds data.
Product preview
What it is. The canvas that shows what a chat build is making, live: the website from its working folder, the app on the iPhone simulator or the Android emulator, or the pictures a game has drawn so far. Open in panel on a build's result card puts it on the canvas.
The strip at the top says what is happening now, for example Building. Live from the working folder or Delivered. Running on the iPhone simulator. When a site is published, it shows LIVE and the address.
Change one part. When a build is finished, press Select to edit, then click any part of the page or the screen. A small box opens next to it: write what should change (make this button round and green) and press Change it. Only that part changes. Ideas for this part shows matching examples from Discover; click one to see it live first.
Good to know.
- Own window opens the live product in a separate window.
- A site with a database has a Data button: its tables and newest rows, side by side with the page. A preorder sent on the Moonlit Bakery page shows up there within seconds.
- After you change a published site, Publish again sends the change to the same host. Neo asks before anything goes public.
A map for each kind of project
Each kind of project has its own map of how its parts connect.
- A game has the World map: open Game Studio, then the Plan tab and World map (or the game's Map tab on its project page) (World map has the details). It works on game projects only, so in an app or website project Game Dev shows a lock.
- A website has the Site map: in the Product preview, switch from Live to Map. Every page is a card with its real picture, joined by the links between them. Click a card to see the page live.
- An app (iPhone, Android) gets the App map next: every screen as a card, joined by the buttons that lead from one to the next. It is not ready yet, so an app project has no Map switch today. Its Product preview shows the app running on the iPhone simulator or the Android emulator instead.
Developer tools
Four screens on the rail look after a project's code. You never need them to build something: Neo saves versions and checks the code by itself. They work on the project picked at the top of the chat, and Git and Code Metrics read its folder on this computer (projects Neo made have one already; for your own folder, link it in Projects first).
Git
What it is. Every saved version of the project (its repository), without typing commands: what changed, the branches and the history, plus Push and Pull to GitHub. New to this? Git and GitHub, for beginners explains it in plain words, and the first time you open Git a card does too.
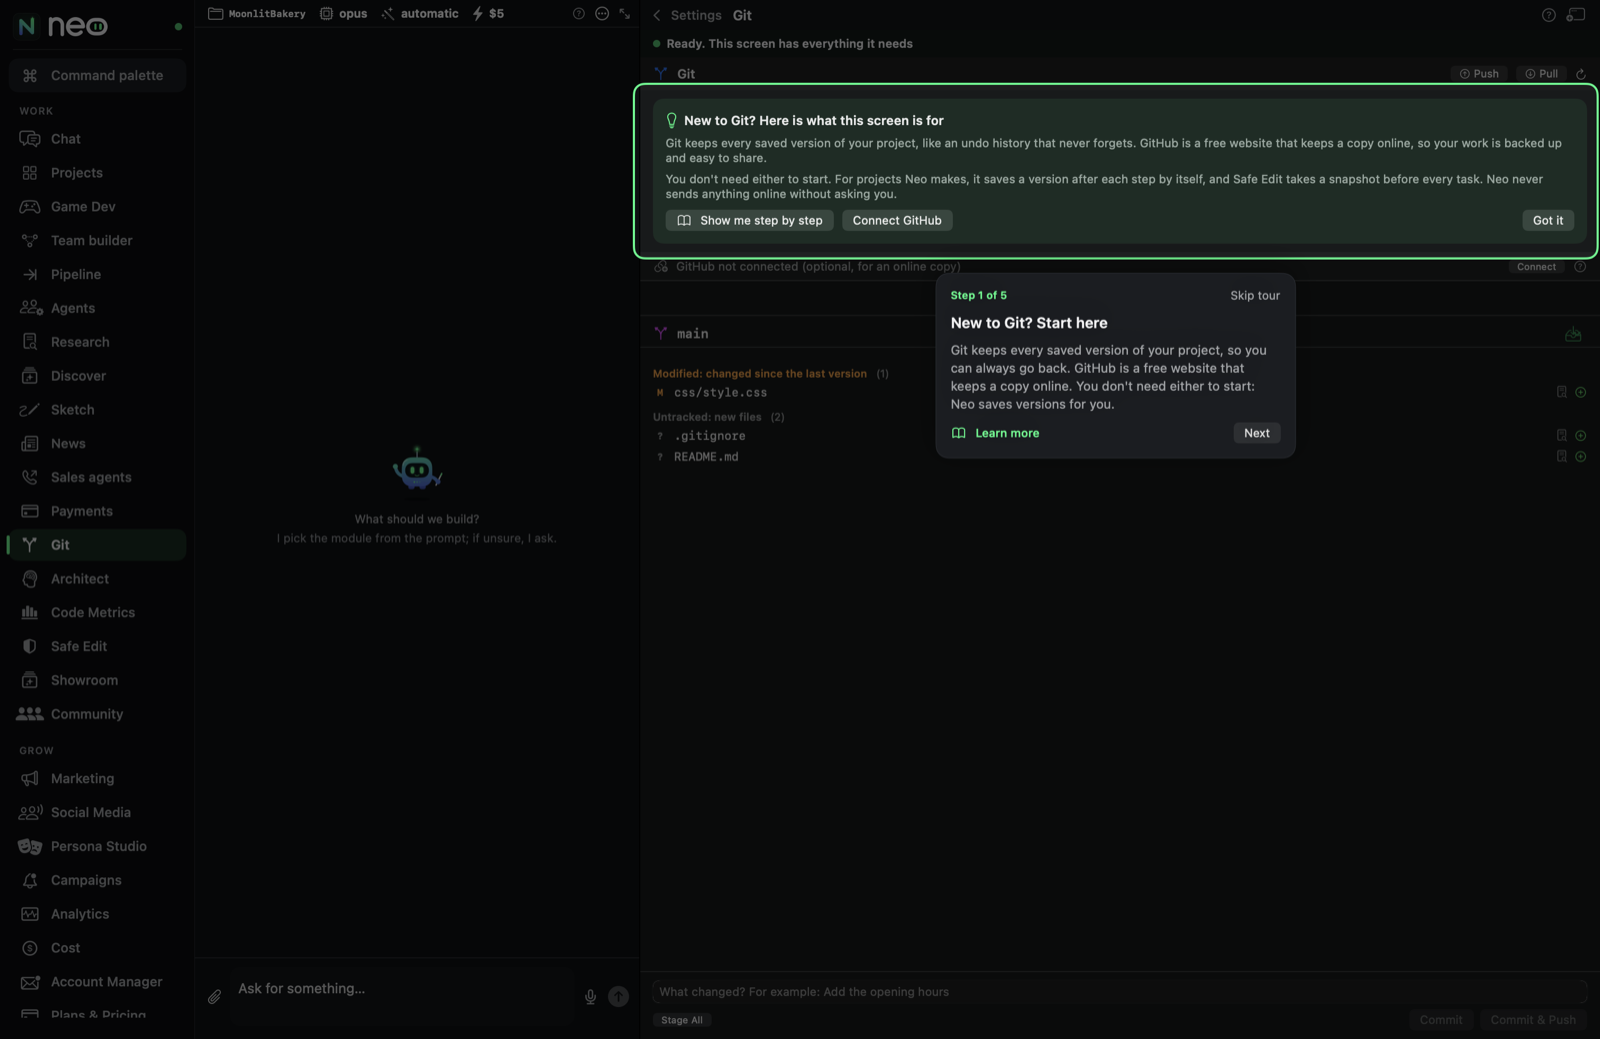
The top of the screen. Push sends your saved versions (commits) to GitHub and Pull brings in versions saved somewhere else; arrows with numbers say how many are waiting each way. The line below says whether GitHub is connected. GitHub is optional; Connect asks for a GitHub key once and checks it at once (how to get a free account and a key). If Git itself is missing on this computer, the screen says so and opens the install (If Git is not installed).
Changes. Files are grouped as Staged (ready to save), Modified (changed) and Untracked (new). Click the magnifier on a file to see what changed in it, and use the button at the end of a row to add it to the next version or leave it out. Write a Commit message (Add the opening hours), then Commit, or Commit & Push to send it straight on. Stage All takes every change. The tray menu at the top puts unfinished work aside (Stash Changes) and brings it back (Pop Stash).
Branches. A branch is a separate copy for trying an idea. The one you are on is marked current. New starts a branch, for example new-menu to try an autumn menu without touching main, your normal copy; Switch moves between them. PR (a pull request, asking on GitHub to merge a branch into main) is coming soon.
History. Every saved version, newest first, with its short id and date. Versions saved outside Neo show up after a refresh. To go back to one, ask the chat, for example undo the change called Add the opening hours.
When something goes wrong. The message under the branch name says what to do, like GitHub has newer versions than this computer. Press Pull first, then Push again.
Architect
What it is. A senior reviewer that watches Neo's tasks, reviews what the agents make and suggests improvements. It uses the model you set up in Settings › Models or API Keys; without one, the screen says what to add.
How to use it. The cards at the top show whether it is active, which model it uses and how many calls it has made. Pick a project next to Improvement Suggestions and press Analyze: you get a list of improvements, each with a priority from critical to low. Ask the chat to carry out the ones you like.
Prompt Optimizer. Paste an agent's instructions, write its role (for example developer) and press Optimize. The Architect rewrites the instructions to be clearer and shows the result. A line of feedback steers it.
Code Metrics
What it is. A quick health check of the project's code: how many Files, Lines, lines of Code and Comments, how much each language takes, any Warnings, and the Largest Files.
How to use it. Open it on a project with a linked folder; it counts at once. A very long file is the first place to split: ask the chat split js/app.js into smaller files, then press the refresh arrow to count again.
Safe Edit
What it is. A safety net for a project, so an agent never leaves it broken. It has three tabs.
Pending Diffs. With Require diff approval on, every file an agent wants to write waits here instead of being written. Click one to see the old and new lines side by side, then Approve & Apply or Reject (a reason helps the agent try again).
Checkpoints. Neo takes a snapshot before each task, for example Before: add the opening hours section, with the files it changed. Restore puts the project back; your current state is saved first, so a restore can be undone. Verify build builds the project now and says whether it still works.
Settings. Safe Edit Mode takes the snapshots, checks the build after each task and rolls back when it fails. Require diff approval holds every write for you. .neoignore lists files agents must never create or edit, one pattern per line, such as *.key or /legacy/. Press Save settings or Save .neoignore.
Game Studio
Game Studio (under Create on the rail) makes 2D and 3D games with Neo's game engine, a free program that builds and runs games. If it is not on this computer yet, install it from Settings, Modules and tools (Neo downloads it for you). You can do almost everything from the chat (make a pixel art platformer about a fox in a forest), and the Game Studio screen shows the game's plan, rooms, art and tests so you can see and change each part.
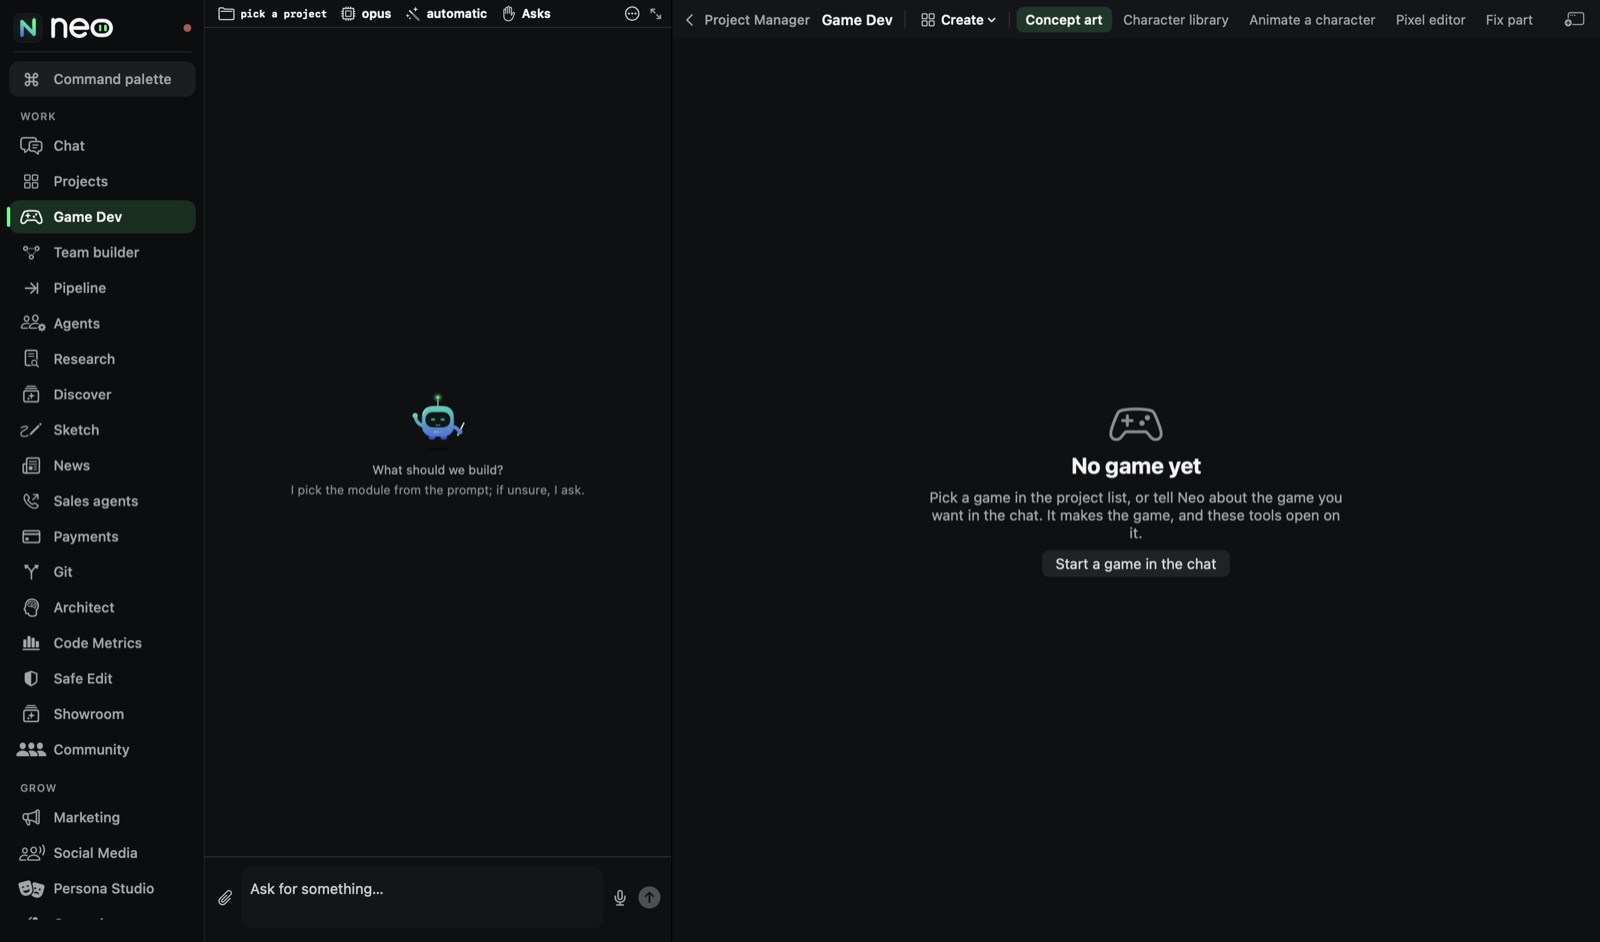
No game selected? The screen says No game yet. Pick a game in the project list, or press Start a game in the chat and describe it.
Finding your way around
At the top of Game Studio there is a group menu (a grid icon with the group's name) and, next to it, the tabs of that group. Click the group menu to see every tab at once. A tab that does not fit this game (for example a 3D tool on a 2D game) is greyed out and says Not available for this project.
| Group | Tabs |
|---|---|
| Plan | Pipeline, Level flow, World map, Quality checks, Play & test |
| Create | Concept art, Character library, Animate a character, Pixel editor, Fix part of an image, Asset generators, Level layout |
| Assets & style | Assets, Environment settings, Style & rules, Help & prompts |
| Ship | Code, Version control, Publish |
A new game opens on Concept art, so you can settle the look first.
More for this game (top right) brings Neo's other modules to the game you have open. Each item writes a ready message into the chat for you to check and send: In-app ads, App Store page and ASO, Ads and social posts, Promo video, Analytics, and Leaderboards and cloud saves. Below them, Pipeline and Team builder open Neo's general Pipeline and Team builder screens.
Pipeline (the game's steps)
Every step from concept to release, in order. The Pipeline tab is a map of the work a game needs: Concept, Style and rules, Character, Animations, Tileset, Environment, Room layout, Level flow, Quality checks, Play test and Publish. Each step is done in one tab, and the map shows what is ready, done or out of date.
Starting. A game without a pipeline shows Start this game's pipeline. Pick a template: 2D platformer slice, Top-down RPG, Hand-painted action RPG or Puzzle. You can add, remove and reconnect steps afterwards.
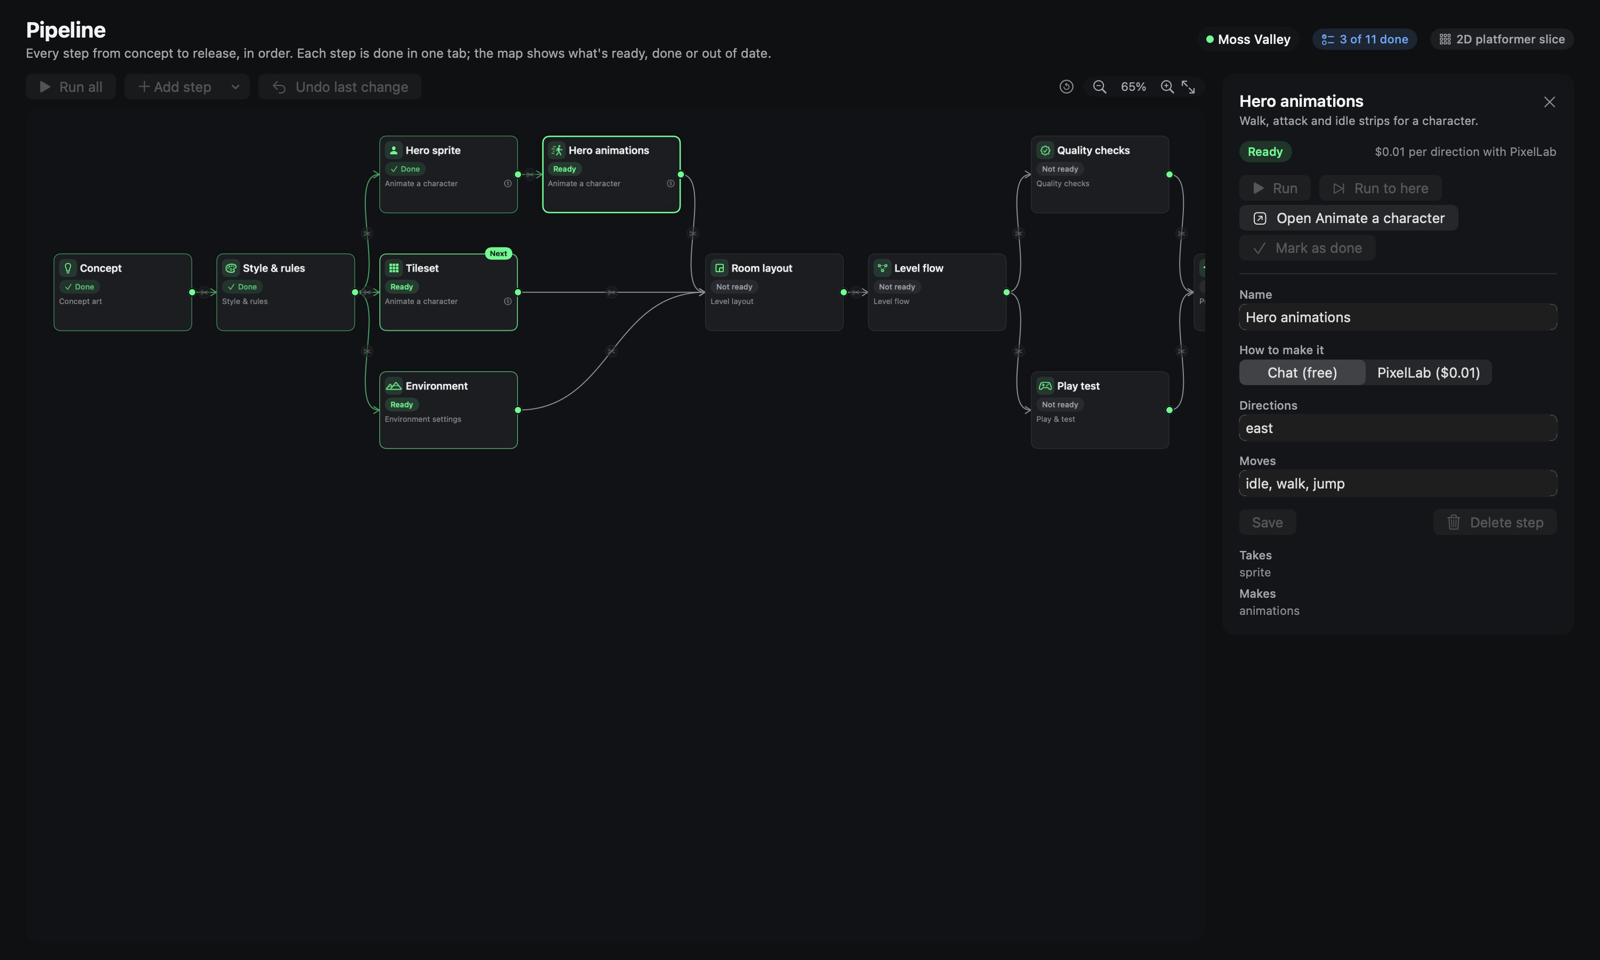
Reading the map. Each step shows its state: Not ready (it waits for an earlier step), Ready, In progress, Needs approval, Done, Failed or Out of date. The top shows how many steps are done, for example 3 of 11 done. If something a step was made from changed, Neo says how many steps are out of date and offers Re-run them.
The toolbar. Run all runs every ready step in order. Add step adds one. Undo last change takes back your last edit. The clock button starts over from a template. The zoom buttons and Fit the whole map help on big maps.
A step's panel. Click a step to open it on the right:
- Run makes this step. Run to here makes every step up to this one.
- Open jumps to the tab where the step is done (for example Open Animate a character).
- Mark as done when you made it yourself.
- How to make it: Chat (free) uses your AI model; a paid option such as PixelLab shows its price. Paid steps wait for Approve and go on.
- The step's own settings, such as Name, Idea, Palette, Size (px), Moves or Directions. Press Save after changing them. Delete step removes it.
- Takes and Makes show what the step needs and what it produces.
Connecting steps. Drag from the dot on the right of a step to another step to connect them.
Level flow
The rooms of your game and how the player moves between them. Each card is a room; the arrows are the ways between rooms.
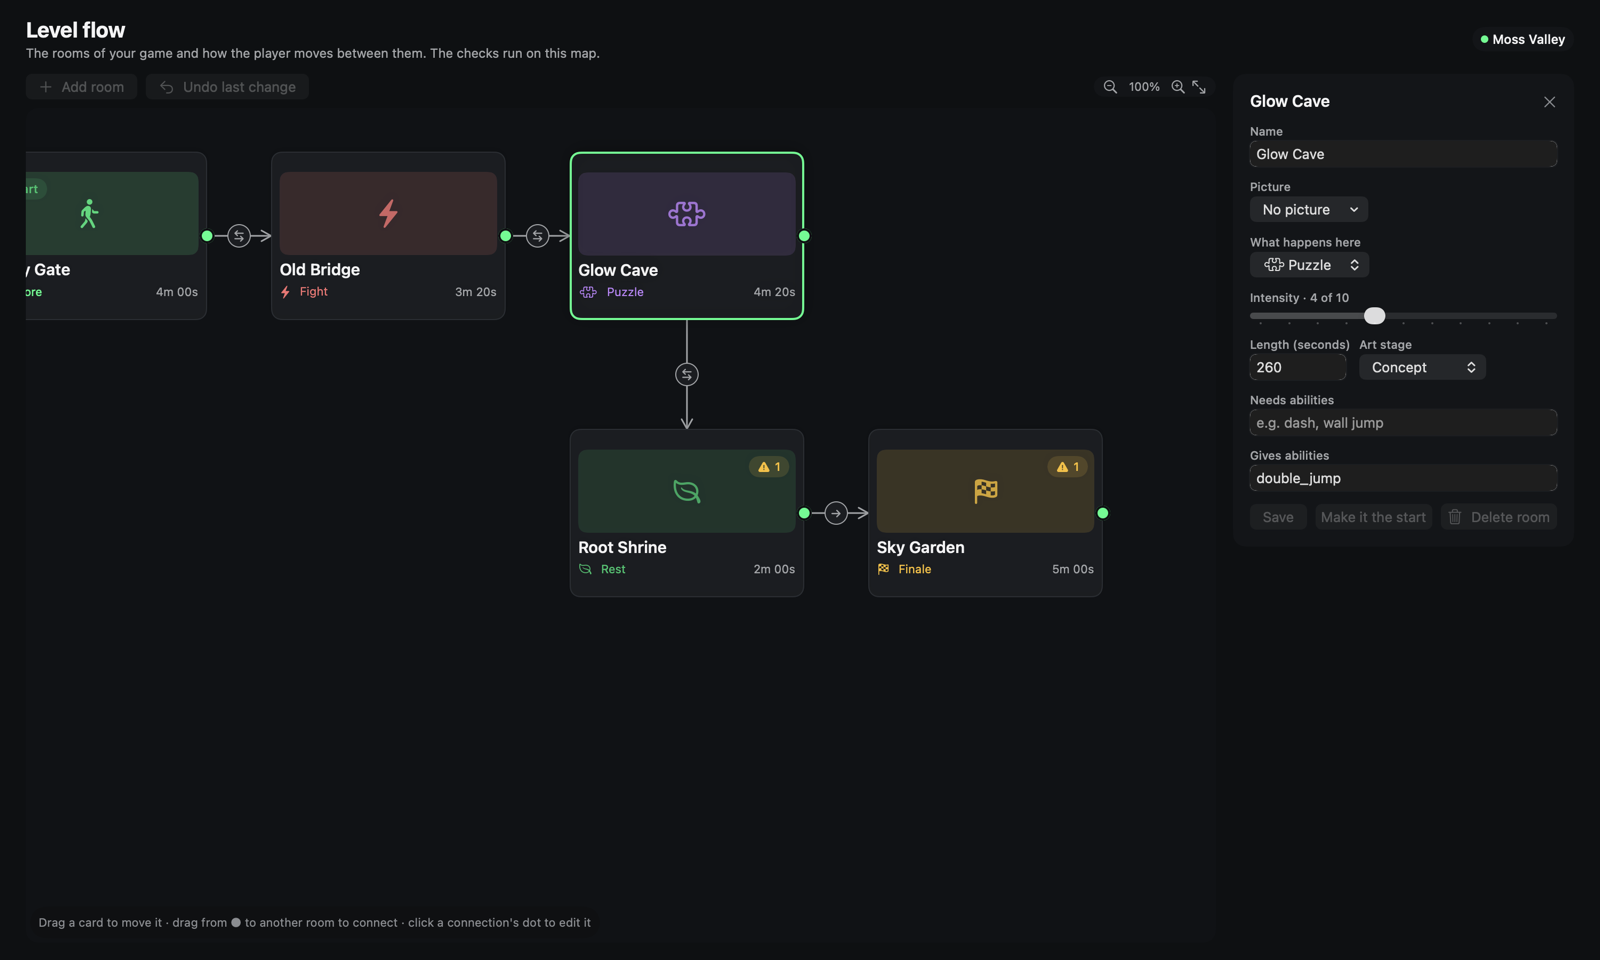
- Add room asks for a name (for example Sunken Bridge). Ask Neo lets the chat suggest rooms.
- Add a level puts a new level in the plan: Add a level at the end, or right click a way between two levels and choose Add a level here to put it in between. A new level is planned until Neo builds it; a planned level can be moved or removed. When the board shows your game's own levels (read from its files), adding one turns them into the plan first, and one Undo brings the old plan back. Double click a level to open it.
- Drag a card to move it. Drag from the dot ● on a card to another room to connect them. Click a connection's dot to edit it.
- Click a room to edit it: Name, Picture, What happens here (Explore, Story, Fight, Rest, Puzzle or Finale), Intensity (1 to 10), Length (seconds), Art stage (Greybox, Concept or Finished art), Needs abilities and Gives abilities (for example dash or double jump). Make it the start sets where the game begins. Save keeps your changes; Delete room removes it.
- Click a connection to set the Arrival point, which way the Player faces, One-way (no going back) and Camera glides to the next room. Disconnect removes it.
- The side panel lists Rooms, Connections, the Main path and Checks. A small warning on a card means a check found something, for example a room the player cannot reach. When everything is fine it says All checks pass.
The view switch at the top also offers Game map and Story goals.
World map
The World map shows the whole game world and lets you build rooms by hand. Beta.
- Modes: Select, Paint and Link doors.
- + Room adds a room; Remove room deletes the selected one. Undo and redo are next to them. Find a room searches by name.
- Build and play offers Play it, Watch Neo play it and Build and film.
- Click an object and use Tell it what to do with Go to change it in words. A click picks the thing under the pointer, not the whole room; click it again or press Esc to pick the room around it.
- To look around: drag to turn, scroll or pinch to zoom toward the point under the pointer, and slide with two fingers, Space or Shift drag, or the arrow keys. F or a double click brings the picked thing into view.
- An Ask from the map changes only that room, and Neo shows what else changed, if anything.
- You can look at a room from the side, from the top, as levels, or in 3D. In 3D, Top view goes back and Play starts it.
If it cannot load, it says The world map could not open. That usually means Neo's engine is busy; see Troubleshooting.
Quality checks
Which production steps have proof for each room, and the thresholds the checks use. A grid shows each room against the steps (Sketch, Greybox, Concept, Landmarks, Dressing, Door, Steps), marked Approved, Rejected or Needs review. Below it, Neo's checks show each measurement as Pass, Warning or Fail. This tab is for reading; you fix things in the other tabs or in the chat.
Play & test
Run the game and see what went wrong.
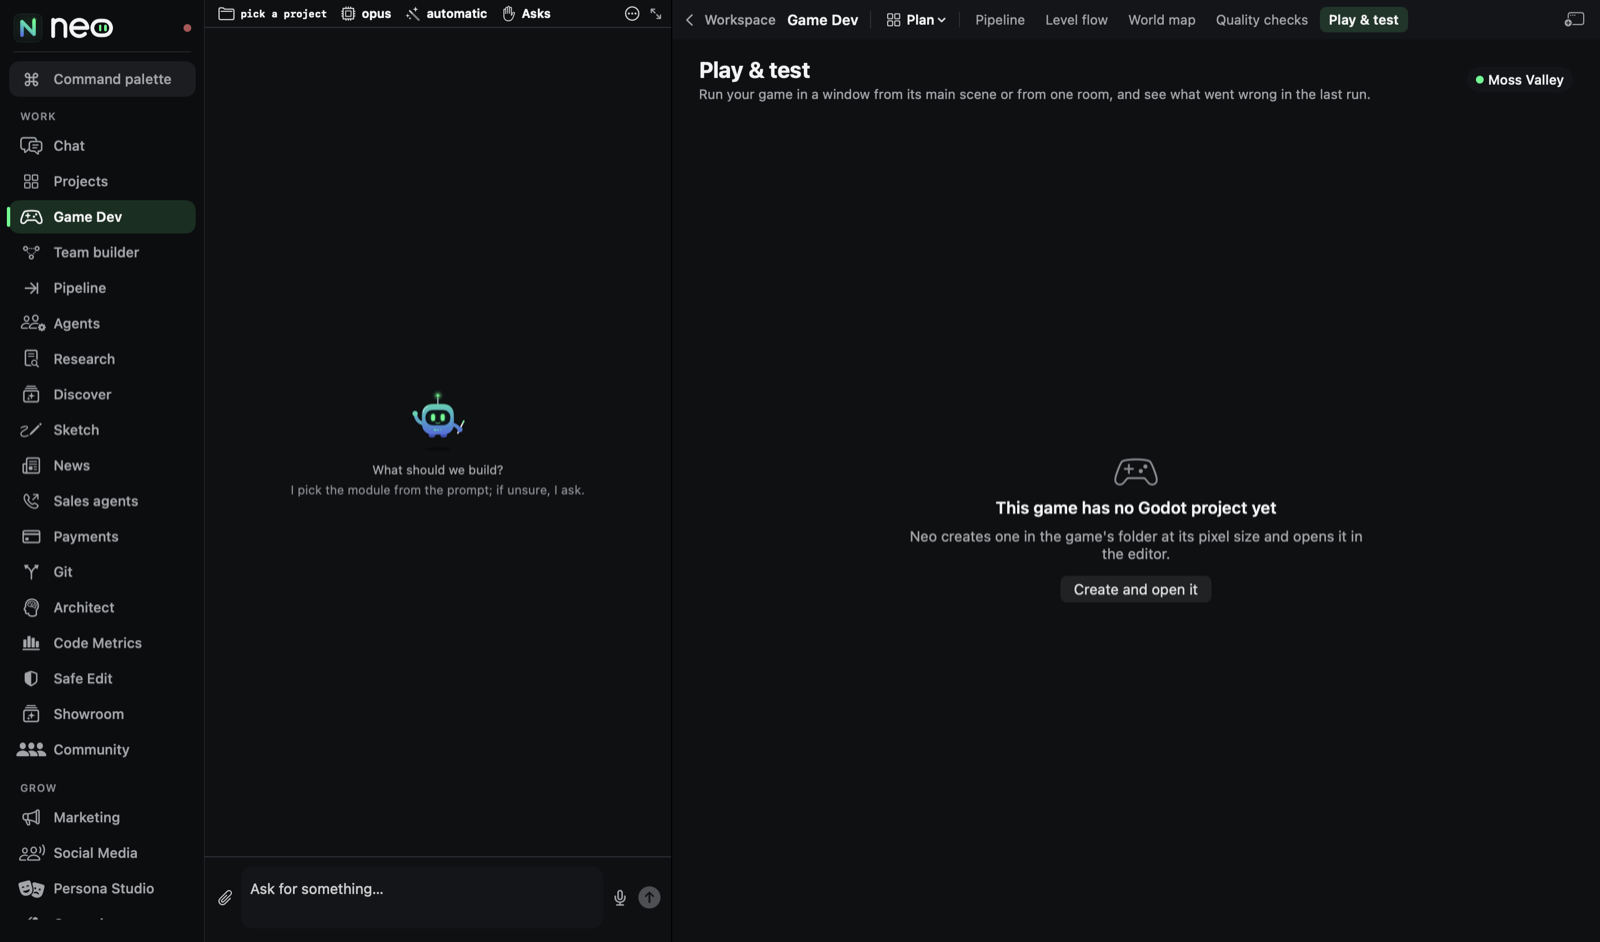
- Start in picks where to start: Main scene or a room.
- Play runs the game in a window. Stop closes it. Open in the editor opens the game in the full level editor.
- Last run shows No errors or how many errors the game printed, so you can ask the chat to fix them.
- A game that is not set up yet shows This game is not set up to play yet. Press Create and open it: Neo sets the game up in the game engine in about a minute.
- If Play says the game engine is not installed yet, press Install game engine on the same screen (or Install next to Game engine in Settings, Modules and tools), then press Play again.
- For iPhone games you get Play and Build and play again. The game opens in the iPhone simulator; the first build takes a minute or two.
Lane board (Studio mode)
Only with Studio mode on (Settings, Appearance). Each lane is an AI session with its own list of tasks. Lanes shows what each lane is working on, Send a task to a lane queues a task that is written only after you approve it, and Game engine shows which lane has the game engine right now, since only one can use it at a time.
Concept art
Turn a reference image or a description into a concept, then into an asset request. Nothing is charged here.
- Reference image: press Choose image and pick a PNG sprite. Its palette is read from the picture for free.
- Or start from a description: write a line such as a fox with a paper lantern, warm orange cloak and press Concept from description.
- The right side shows each request exactly as it would be sent. Concept to asset turns the concept into an asset request with its price; making it still needs a key and your approval.
Character library
Save a character once, then animate it again and again. The list on the left holds Saved characters and the ones found in your assets. Pick one to see it from eight sides and its animations. Save as character keeps the one you are looking at. New directions and animations are made in Animate a character.
Animate a character
Pick a provider, directions and a motion. See the exact request and its price before anything is generated.
- Provider: the service that draws the frames. A provider without a key says so and names the key to add.
- Mode: Image draws a single picture, Template uses a ready motion such as a walk, Describe it lets you write the motion in words.
- Directions: each direction is one generation, so pick only the ones you need.
- Request shows what will be sent and the price. Preview (free) refreshes it. The paid button asks before it spends.
- Draw with chat asks your own AI model instead, at no extra cost. The frames land in Frames, ready to save to the library.
3D asset studio
Every 3D model of the game you picked in Game Studio, in a real 3D view. Ask the chat for a model (for example a low poly supply crate with a glowing screen); it is built on this computer for free and shows up here by itself. Models the game already had are listed under Game, and Bring in makes them editable here too.
- Look at it: drag to turn the model any way, from above and below too. Scroll or pinch to zoom, right drag to slide it. Reset view goes back to the first view; the buttons under it turn, zoom and look from higher or lower.
- Click a part: it glows green and a small chat bubble opens on it, always above the model. For a new shape, say what you want (for example make the arm longer and spikier) and press Ask Neo: Neo's chat changes only that part and builds the model again. Parts picks a part from a list instead, and Show the version before compares with the last one.
- The whole model (left): height in metres, triangle budget, Faceted or Smooth, Rounded edges, a colour for each material, the Origin (at the feet or in the middle), the Collider (the invisible shape the game uses when something bumps into it: Box, Hull or None) and Simpler far away (a lighter copy when the model is far from the camera).
- Part (right): only the part you clicked. Colour, Finish (matte, plastic, metal, glass or glowing, with how strong the glow is), Size, Place (right, up, forward in metres), Turn, Show this part, Mirror copy on the other side and Copies side by side. Reset part puts it back.
- Moves (right): the model's animations. Play one in the 3D view, pause or stop it, change its Speed, choose Loop or once, remove it, or Add a move from Neo's library (idle, walk, run, jump, attack, get hit, fall down, wave, spin, bob, and open or close for a lid or a door).
- Game (right): where the model is used in the game, scene by scene. Open in scene jumps to the 3D scene with that object selected. Apply to game replaces the game's copy, and every scene that uses the model shows the new one. Put in game adds it to another scene.
- Every field is applied by Neo's own code a moment after you change it, free and without an AI model (about ten seconds). Turn off Apply right away to collect several changes and press Build again yourself.
- Neo's checks (below): each line says OK, Look or Fix in plain words and runs again after every change; lines that changed are marked. Apply to game works once nothing says Fix.
- Export (top right) saves the model for other tools into a folder you pick (Downloads first), then shows it in Finder: GLB (game ready, for most game engines and the web), FBX (animation and 3D tools, with the rig and moves), OBJ with its colours (shape only, read by almost every 3D tool), USDZ (opens in Quick Look and AR on iPhone, iPad and Mac), the Editable source (the 3D app file, every part apart) and Pictures (a turning GIF and four views). Choose whether the moves and the collider go along.
Pixel editor
Fix sprites and animation frames by hand, using only the sprite's own colours. Pick asset opens any asset and animation from the library. The tools on the left (Pencil, Fill, Line, Eraser, Pick colour, mirror and more) draw on the frame in the middle; the right side has the Palette and the frames. Save to the library when you are done.
Fix part of an image
Redraw one area of a sprite frame and keep the rest as it is. Follow the four steps at the top: Pick a frame, Drag a box over the part to change, Describe the change (for example the lantern glows brighter), and Preview. Fix with chat does it with your own AI model; the paid fix shows its price and asks first.
Asset generators
The services that make your game's art, which ones are ready, and the jobs they have run. How an asset is made shows the steps from request to saved file, Providers lists which image services have a key, and Jobs lists what they have made for this game.
Level layout
Place objects in a room, move them, and check the room rebuilds the same way. A game without a laid out room shows Create a demo room. The room is in the middle at its real size; Layers and the selected object are on the right; the checks below show objects placed on exactly the same spot.
Assets
Every sprite in this game and its animations, playing live. Upload sprite brings in your own picture. Pick an asset in the list to see it, its animations and Animate this asset, which takes it to Animate a character.
Environment settings
Changes the game's data, never its art. Sky, parallax and camera settings appear here once the game has them. Pick one on the left to see a preview and the saved data, change it and save.
Style & rules
Rules this game's art, sound and levels should follow. Add a rule takes the rule, a category, a strength (Should or Must) and why it exists, for example Lanterns flicker on a half second loop. Neo's built in rules apply too. Every module that makes something for the game reads these rules.
Lessons waiting for you sits above your rules. A lesson is something Neo learned while making a game, like a mistake to avoid next time. Each one shows the rule, what to avoid, why, and the run it came from. Press Approve to keep it, and Neo follows it in every future Game Dev task; press Reject to drop it. Duplicate of means Neo already knows a lesson much like it.
Help & prompts
How to use Game Studio: commands, ready made prompts and fixes for common problems. The Sections list has Getting started, Commands, Prompt book, Recipes and Troubleshooting. In the Prompt book, pick a prompt and press Copy to paste it in the chat. The Commands column lists every command the chat can use, read live from the app.
Code
Read and edit the game's files, with a backup before every save. Pick a file on the left; Switch… opens another game or a folder. Edit in the middle and press Save (a backup is kept first). Undo restores the backup, Check looks for problems, and Explain & fix asks the chat about them and proposes a change for you to review.
Version control
Link the game to GitHub, check for leaked keys and preview commits. This tab is optional: GitHub is a free website that keeps a backup copy of your game online. Git and GitHub, for beginners explains it and shows how to make a free account and a key. Repository picks the account; Connect GitHub stores your token in Neo's key store, where it is never shown. Safety check looks for keys and passwords before anything is committed. Automatic commits chooses when Neo records your work, and Preview a commit shows one without making it. Nothing is pushed or merged from this screen.
Publish
What each store needs, and a practice run of the release steps. Pick a platform on the left to see You provide, Neo does, the Keys needed (names only) and the Steps. Every store needs your own account: itch.io is free and the easiest place to start, while Steam and Apple charge a fee. Run practice release walks through Check, Build, Sign, Package, Validate, Upload, Release and Record without sending anything anywhere. More for this game takes the game to the store page, ads, a promo video and the rest of Neo.
Web game and YouTube Playables (in the Ship group, and on the game's Releases tab) turns a 2D game into a game that runs in a web browser: press Web game or YouTube Playables. Neo works on a copy (your game's folder stays as it is), plays the result in a browser to check it, and lists What Neo checked and To fix. Try it in your browser opens it, Show the zip to upload finds the file for YouTube, and Ask Neo to fix it hands what is left to the chat. Nothing is uploaded; sending it to YouTube is your step on YouTube's site.
Platforms and stores
Games made in Neo's Game Studio can be exported for macOS, Windows, Linux, the web, iPhone and Android. The Publish tab knows Steam, the Mac App Store, the App Store, Google Play and itch.io.
Consoles (Xbox, PlayStation, Nintendo) are ready, needs the platform's licence. Neo can prepare the game and a submission draft, but console makers only let approved developers build and publish. You need your own developer agreement with each one; Neo does not publish to consoles directly.
Team builder
Add roles, pick each one's model and draw who hands work to whom. A team is a group of AI agents, each with one job, working together on your request. A Lead splits the work and checks it; the others build, design, test or write.
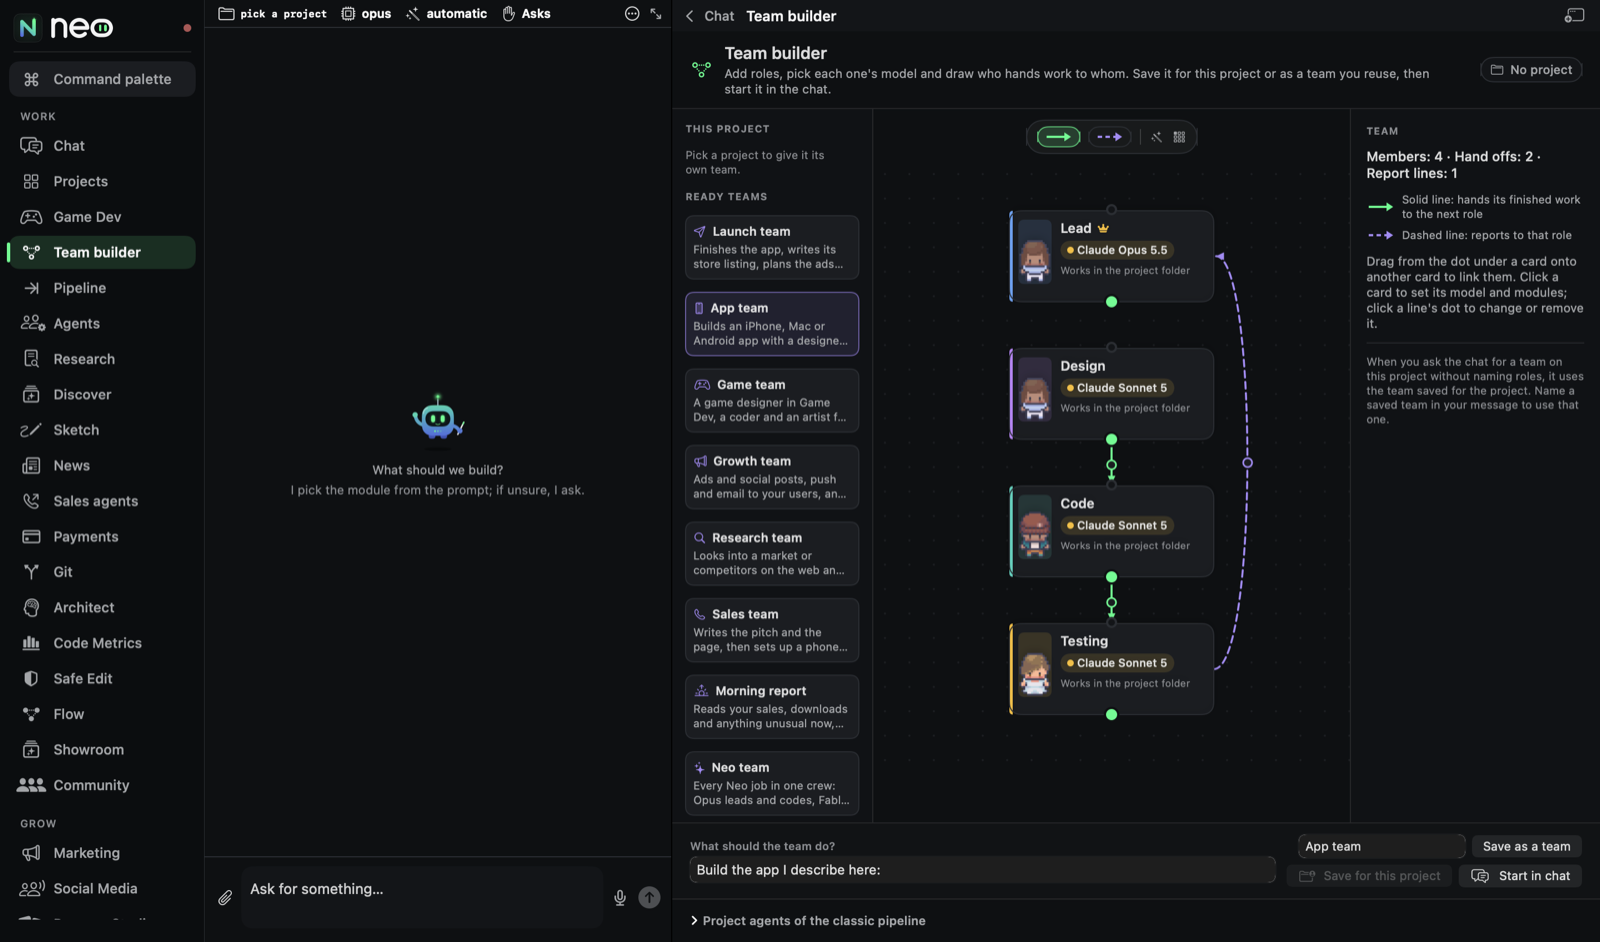
The left list
- This project: the team saved for the project you have open.
- Saved teams: teams you saved to reuse anywhere. The bin icon deletes one.
- Ready teams: teams Neo made for common jobs: Launch team, App team, Game team, Growth team, Research team, Sales team, Morning report, Neo team and Product team. Click one to load it.
- Add a role: the roles you can put on the canvas, in two groups, Build and Grow and run. Roles include Lead, Product, Code, iOS, Android, Web, Backend, Pictures, Testing, DevOps, Research, Design, Copy, Marketing, Store listing, Sales, Analytics, Game design and Scheduled report.
Linking roles
Each role is a card. Lines between cards say how work moves:
- Solid line: hands its finished work to the next role.
- Dashed line: reports to that role.
Pick the kind of line with the two buttons at the top (Hands work to or Reports to), then drag from the dot under a card onto another card. Click a line's dot to Make it a report line, Make it a hand off or Remove the link. Connect for me draws sensible links for you; Tidy up lines the cards up.
The panel on the right counts members, hand offs and report lines. If nobody leads, it warns you: Add a Lead so someone splits the work.
A role's settings
Click a card to set:
- Model: which AI this role uses, grouped as Claude, Codex and Pictures. For example Claude Opus for the Lead and Claude Sonnet for the builders.
- Skills (Neo modules and their tools): press Add a module to give the role Neo's tools, for example Game Dev or App Store and ASO. Module tools work with Claude members only.
- Hands work to and Reports to: the same links as the lines, as a list, with Add a link.
- Take off the team removes the role.
A Scheduled report role also has a Schedule, written in words like every weekday at 09:00.
Saving and starting a team
At the bottom:
- What should the team do? Say what to build or do.
- Team name.
- Save as a team keeps it to use again on any project.
- Save for this project makes it this project's team. When you ask the chat for a team here, it uses this one.
- Start in chat puts the team's card in the chat. Nothing runs until you approve it there.
Pipeline
Neo's modules one after another: plan, design, code, test, media, marketing, report. Where the Team builder says who does the work, the Pipeline says in which order. Each stage is a real chat turn in its module; the next stage gets the files and the result of the one before.
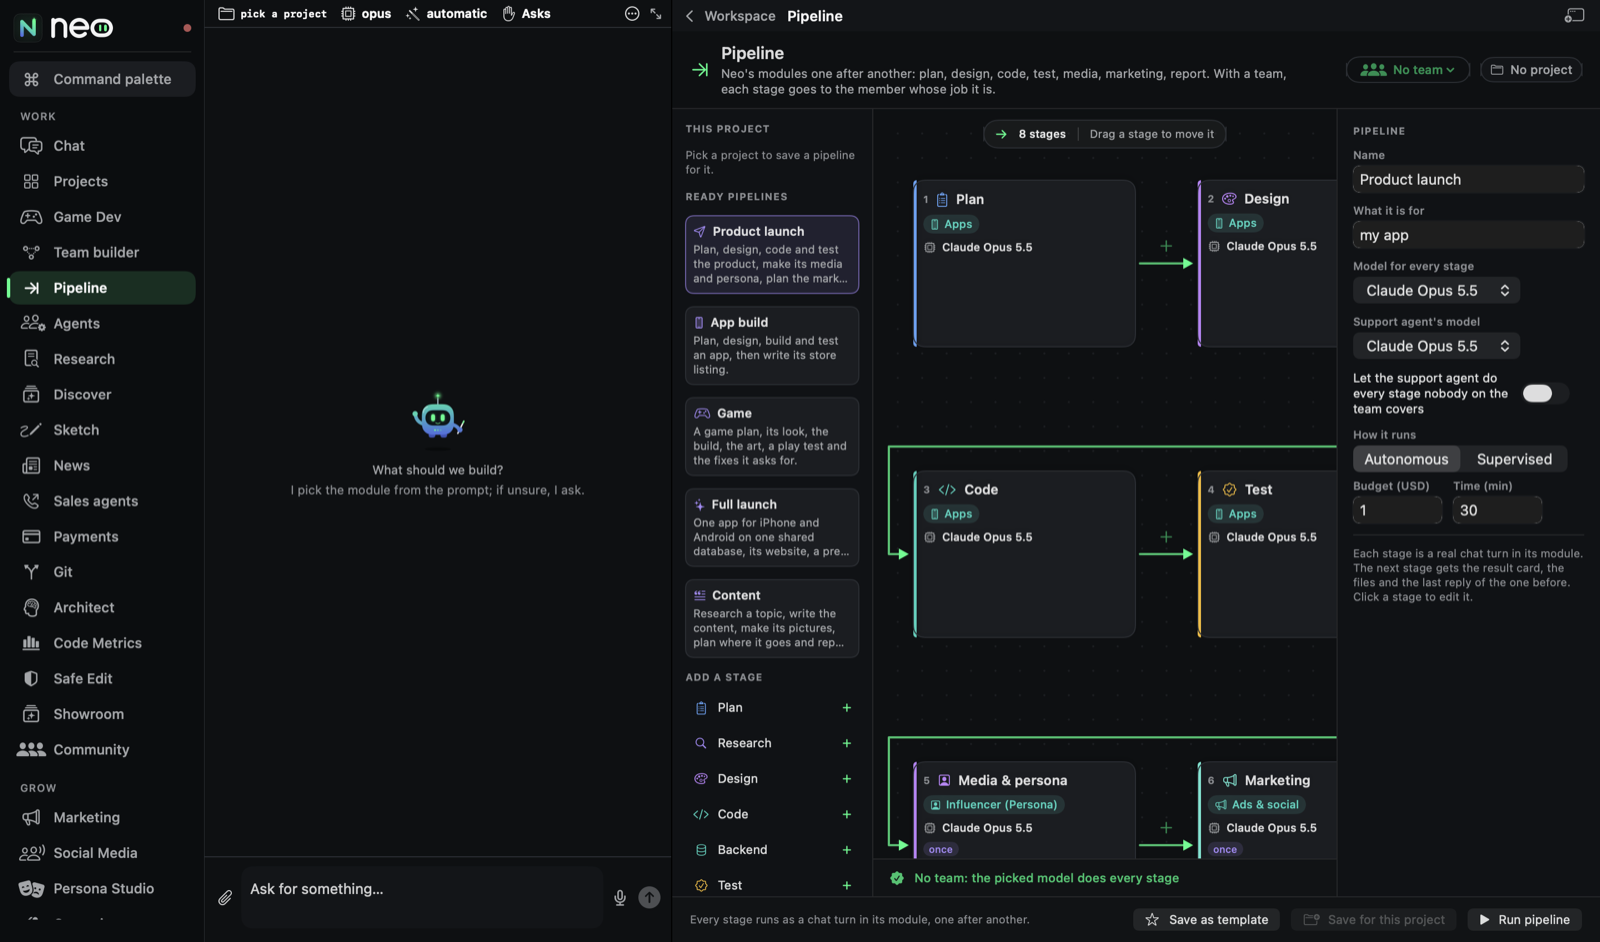
Starting from a ready pipeline
The left list has This project, Your templates, Ready pipelines, Add a stage and Recent runs. The ready pipelines are:
- Product launch: plan, design, code, test, persona and media, marketing, report, and a fix up stage that only runs if the report asks for changes.
- App build: plan, design, code, test and the store listing.
- Game: a game plan, its look, the build, the art, a play test and the fixes it asks for. An in game ads stage is included but off.
- Full launch: one app for iPhone and Android on one shared database, its website, a promo and more.
- Content: research a topic, write the content, make its pictures, plan where it goes and report.
Stages
Stages run left to right and wrap onto the next row.
- Add a stage: click a job in the left list (Plan, Research, Design, Code, Backend, Test, Media, Marketing, Store listing, Push and email, Deploy, Report, Revise, Write and more). It goes after the selected stage, or at the end.
- Insert between: every arrow between two stages has a small +. Click it to put a new stage right there.
- Right click a stage for Add a stage before, Add a stage after, Move earlier, Move later and Remove this stage. You can also drag a stage to move it.
- Connections are drawn for you in order. A dashed purple arc means go back if changes are asked, for a set number of times.
- Small tags on a stage: off (it will be skipped), if changes asked, once. A hand icon means it waits for your OK.
Settings
With no stage selected, the right panel holds the pipeline's settings: Name, What it is for (for example Lantern, a habit app for iPhone), the model for every stage, How it runs (Autonomous: works on its own within the budget and time; Supervised: asks you before anything paid or public; the default here is Autonomous), Budget (USD), the most it may spend on paid tools (default $1), and Time (min) (default 30).
Click a stage to set its own Label, Job, Module, Instruction, Who does it (the team member whose job it is, a chosen member, the support agent or a model), Wait for my OK before this stage starts, and its Flow: what it reads from, whether it runs only when the review asked for changes, and where to go back to.
The team chip at the top picks which team does the stages. With No team, one model does every stage.
Saving and running
- Save as template keeps it in Your templates for any project.
- Save for this project keeps it with the project.
- Run pipeline starts it. It stays greyed out until every stage has someone to do it.
While it runs, each stage shows Waiting, Working, Done, Failed, Skipped, Needs your OK or Stopped. Use Approve and go on for a stage that waits for you, Stop to stop, Resume to carry on, and Back to editing to change it.
Growing what you built
The Grow group on the rail, and these chat modules, help you earn from what you made and get people to find it.
In-app ads
What it does. Puts ads inside your app or game: where they go and why, with AdMob, AdSense or Unity Ads. It also handles the consent screen, how often ads show, a Remove ads purchase, the store privacy answers and the app-ads.txt file.
How to start. Add ads to my game, or More for this game, In-app ads in Game Studio.
The plan card. Neo shows Ads in your app with a Test ads badge. Each place an ad could go has a checkbox, and a No ads here list shows the screens that stay ad free. Apps for children get Family safe ads (non personalized, child directed, rated G). Press Add these ads or Not now. Nothing is installed before you press Add these ads.
Test ads first. Builds use Google's test ads until you add your own AdMob ids in Help and setup, In-app ads (AdMob). Test ads earn nothing, but they are safe to click while you try things.
Ads, social posts, push and email
Ads & social writes ad creatives, ad films and social posts, publishes posts and plans campaigns. Push & email sends messages to your users. You can ask the chat (plan a launch week of posts for my app) or use the screens on the rail:
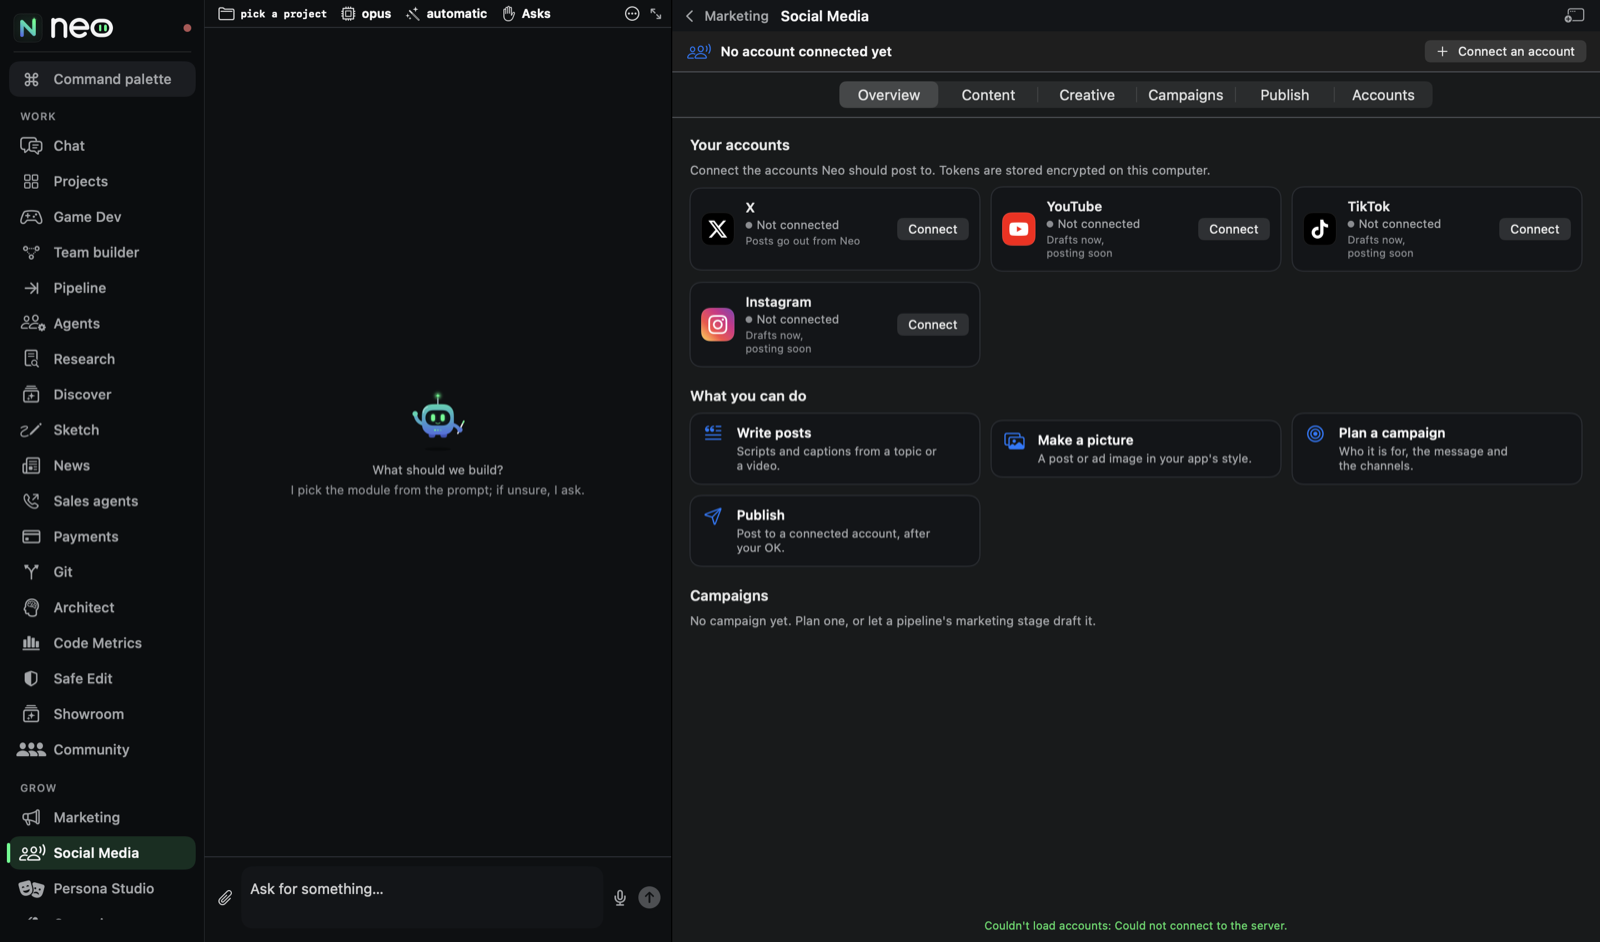
Social Media
Tabs This week, Make a post, Posted, Accounts and More tools. You can post everywhere without connecting anything: each post opens the network's own page with your words filled in, and you press Post there. Neo never posts by itself.
- This week: your project's seven days. Plan my week writes a post for each day from what your project is (free, nothing is posted). A post whose time has come shows under Time to post, with one button per network. Ideas for a post gives ready drafts, some with a picture or a clip.
- Make a post: your words, where it goes, Add a picture or clip from your project (Neo makes them and hides anything private), then Now or On a day. Neo says when the text is too long for a network.
- Posted: what went out, with its link. How did it do? shows likes and reposts where the network shares them (Bluesky); the others say to open the post.
- Accounts: every network and how it works today. Bluesky connects with an app password you make in its settings, no approval needed. X needs your own developer key. LinkedIn, Threads, Instagram, Facebook, TikTok, YouTube and Reddit have to approve Neo first, so they work through sharing until then. Each account shows Connected only after the network itself said yes, or Expired or Needs your action with the reason.
- More tools: a video script with a voice, an ad picture and a campaign plan. These use your AI.
The Marketing screen
Tabs Social, SEO, Press Kit and Email. Everything here writes text you copy; nothing is posted or sent from this screen.
- Social: posts now live in Social Media; Open Social media takes you there.
- SEO: paste a page address in URL to analyze and press Analyze. You get a score out of 100 and a list of fixes.
- Press Kit: Generate Press Kit writes a press page about your project; Copy Markdown takes it with you.
- Email: pick the kind of email (Launch, Update, Waitlist, Feature) and press Generate Email Template; Copy HTML copies it.
If you have apps in the store, the picker at the top fills the generators from an app's store page. Example: for a bakery site called Moonlit Bakery, a Launch email that opens with Fresh bread before sunrise.
Campaigns: push and email
Push messages and emails to your app's users. On the left, pick the APP; its user counts show under TARGETS. Pick Push or Email, and who gets it (All Users, Free Users, Subscribers, New (3 days), Inactive 7d or Inactive 30d). Fill in the Notification title and the message; an email also takes the CTA button text and CTA URL, and Preview shows it first. The send button (Send Push or Send Email) sends to real users, so check the target before you press it. Sending needs the push or email service you connected (Setup Guide, Push Notifications or Email Notifications).
Analytics
Sales, downloads and revenue of your apps. Pick the App and the period (Today, 7 Days, 30 Days). Connect links the project's App Store Connect, Supabase or RevenueCat, and Research looks into the app's market.
- Overview: Users, Active Today, Revenue and Crash-free, then Daily Users, Top Screens, Top Events, Countries and insights about what changed.
- Revenue: MRR (monthly income from subscriptions), revenue and downloads for the last 30 days, read from App Store Connect (Apple's site for your apps) and RevenueCat (a service that counts subscriptions).
- Subscriptions: who pays, who is on a free trial, how many trials turn into buyers, and how many people stop paying (churn).
- Funnel: of the people who saw the buy screen (the paywall), how many bought and how many closed it.
Apps Neo builds send their numbers here by themselves once people use them. For store sales, connect App Store Connect or RevenueCat. Until then the cards show dashes, not zeros.
Store pages and ASO
What it does. Helps you get an app into the App Store and Google Play: test versions for friends (TestFlight), the store page, the words people search for (ASO, App Store Optimization), screenshots, legal pages and market research. The App Store needs a paid Apple developer account; Google Play has a one time fee.
How to start. Prepare the App Store page and keywords for my app. Neo writes the name, subtitle, description and keywords, and checks them against the store's rules before anything is uploaded.
Account Manager on the rail keeps your store and developer accounts in one place and shows the daily report Neo makes from your store numbers (Check now, Re-run today's report). The charts (Revenue, 30 days, Downloads, 30 days and so on) appear in Analytics.
Good to know. You need your own Apple Developer or Google Play developer account. Uploading a build or submitting for review always waits for your approval.
Persona promo
What it does. Makes a virtual presenter for your product: a made up person with a consistent face and voice, and short talking videos and reels with them.
How to start. Open Persona Studio on the rail and press New persona, or ask the chat: Make a friendly presenter for my fitness app and a 20 second video.
- Describe the persona. The face is made when the persona is created.
- Identity Kit, Make the identity and Make again set the persona's look.
- Pick a picture model, from Cheap draft to Ultra. Each one shows its cost before it runs.
- New content from a reference makes new pictures and videos with the same face.
- Every persona passes a Not-a-real-person gate (Approve or Reject). Personas are fully synthetic; an AI label and a watermark are on by default.
Picture and video generation is paid by the service you connect, so Neo asks before each one.
Sales agents
AI callers that phone people about what you built. Beta.
What you need. Your own ElevenLabs account (the voice) and Twilio account (the phone line). Press Get set up to connect them.
Making an agent. Press New agent. Each agent has three tabs:
- Setup: what it sells, Calls from (which number), Get a new number, Read the website again, and the sentence It always opens with. That opening sentence is required by law and cannot be changed; on a phone menu or voicemail the agent says nothing and hangs up. Press Save agent.
- People: Add people by pasting a list. Each person has a Call button if they agreed to be called.
- Calls: what happened on each call.
Try it on yourself first. Try it on your own phone with Ring me only rings a number you saved here as your own.
Call me back. This is the safe way to use sales agents. People ask to be called, and the agent calls them back:
- Sites Neo builds can have a Call me section. Turn on Call back people who ask on the site: Neo checks every 10 minutes and calls only inside calling hours.
- Who calls back can be The agent calls back, or A person calls back (you get a reminder).
- For a site Neo did not build, A Call me form for any website gives you a form to paste in. Press Make the form, then Copy.
Cold calls are off by default. Calling people who did not ask is restricted by law. The Cold calls switch stays off until you turn it on, and Neo asks Switch on cold calls? first. Even then agents call only in states the rules allow, only landlines and office lines, inside calling hours, and at most a few a day. Cold calls by state shows the rules; a state not listed is closed. These rules are a reading of the law, not legal advice.
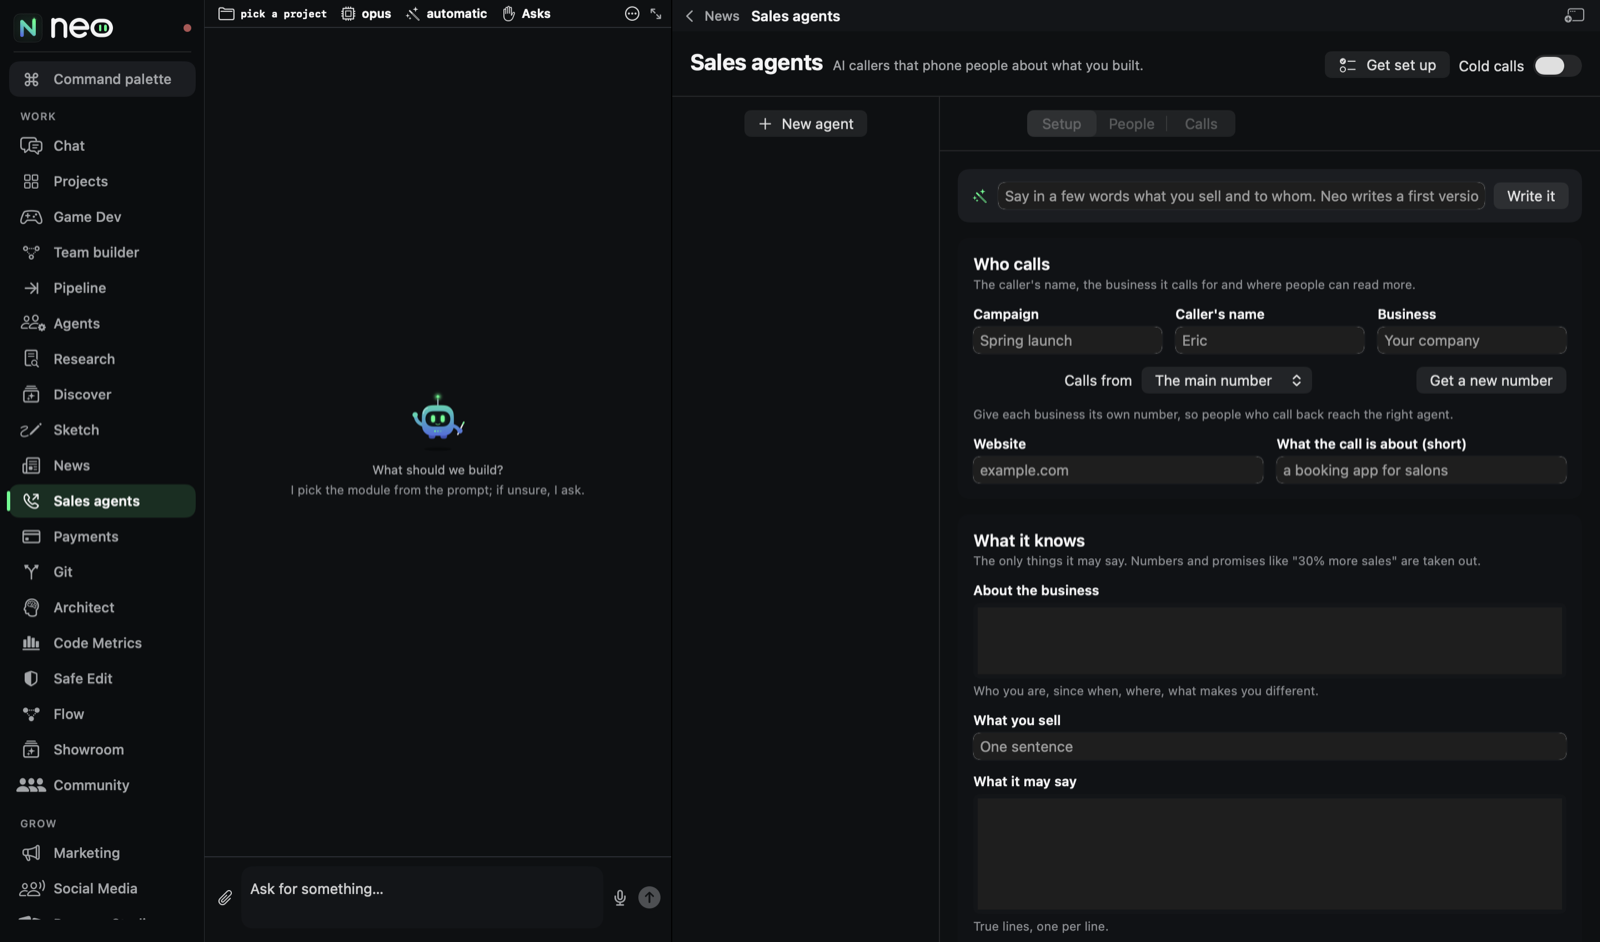
Research
Neo searches the web, reads the best sources and keeps what it found.
- Type What should Neo look into? and, if you like, What do you want to know?. Press Start research.
- What Neo found shows the summary and the sources.
- Ask about it in the chat with Ask carries the findings into the chat.
- Run now repeats it. Schedule runs it again by itself: Every day at 08:00, Weekdays at 09:00, Mondays at 09:00 or Every 6 hours. Stop the timetable turns that off. Schedules only run while Run schedules is on.
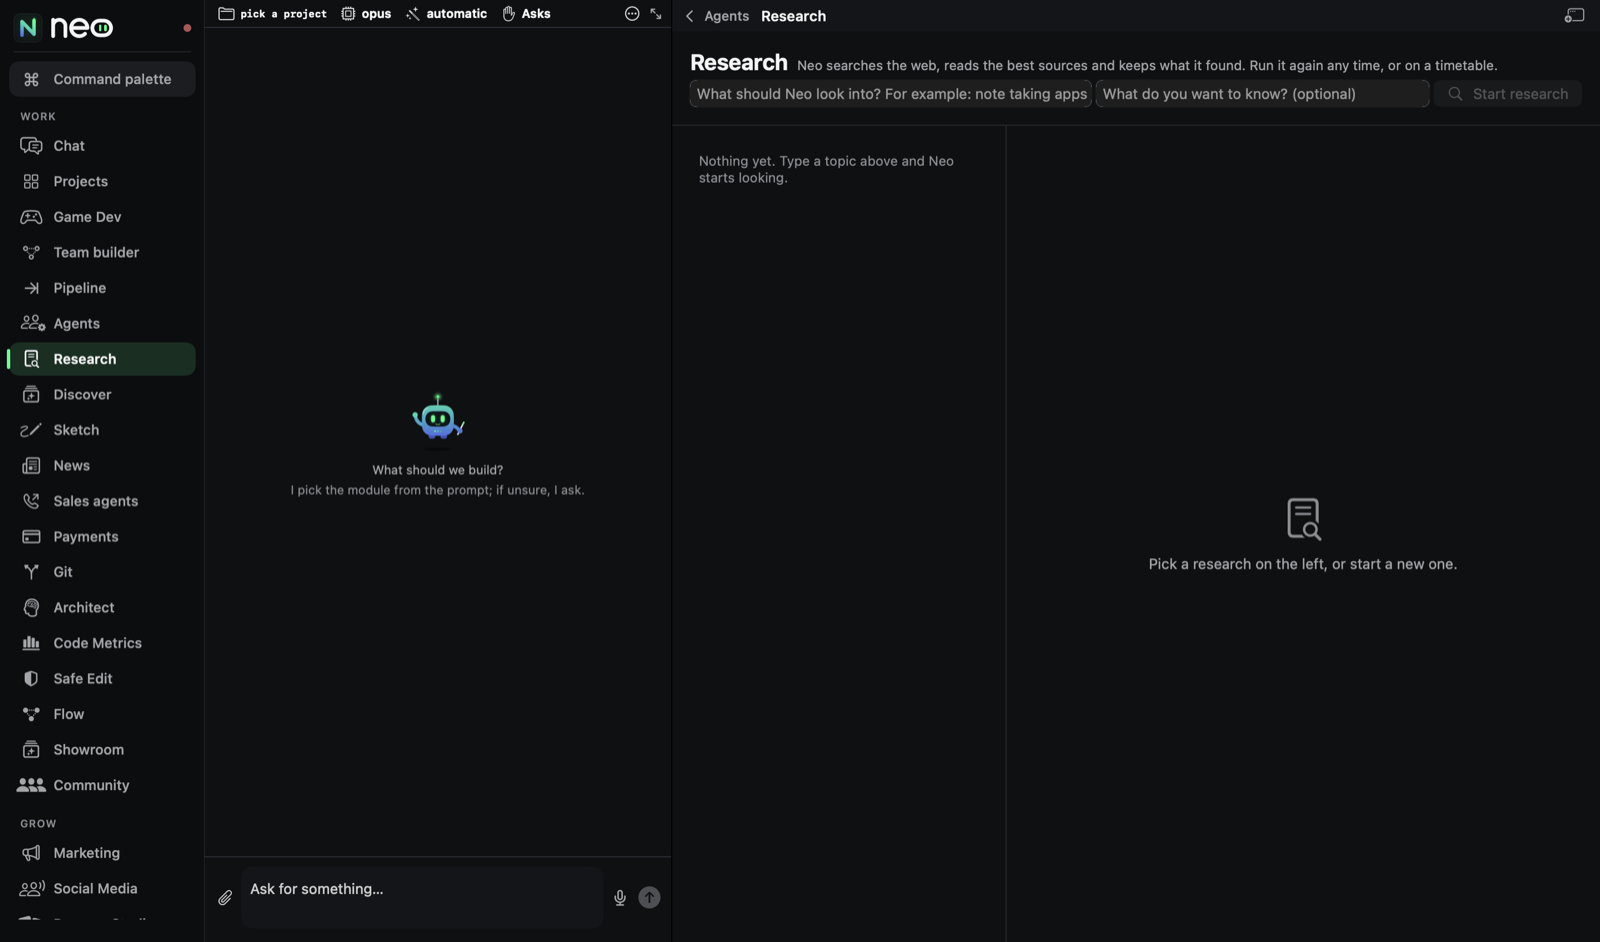
Cost
What Neo's agents and tools have spent, and what a job would cost before you run it.
- Estimate: pick the kind of job (Simple Fix, Feature, Full Page, Full App or Complex App) and a model, add a short description if you like, and press Estimate Cost. You see the price, how many agents would work on it and the tokens in and out. Ollama shows FREE.
- Last 30 days: real spend, by model and by project, with how many tasks finished or failed. The refresh button at the top loads it again.
- Prices come from the providers when Neo can reach them (Prices up to date), else from the prices saved in Neo (Saved prices).
Example: a Feature like add a watering reminder to Pocket Garden on a mid sized model is usually a few cents.
Payments
Sell from what Neo builds with your own Stripe or Lemon Squeezy account.
- Connect Stripe or Lemon Squeezy with a key from its dashboard (Get a key). A Stripe test key (sk_test_) is the safe place to start; Sell with real money stays off until you turn it on.
- What a site sells: name the Site, then make an offer, like Gift box of six pastries, 18 USD, one time, and press Create on Stripe. Lemon Squeezy products are made in its own dashboard; Link my store's products brings them in.
- Recent payments lists what came in, with test payments marked Test.
- The site only links to the provider's checkout, so no key ever goes into a page. iPhone and Mac apps sell through Apple's in-app purchase instead.
Ideas, community and agents
Ideas (Discover)
Motion, layouts, colors and game effects you can put into your app. Ideas (under Discover on the rail) is a library of small, ready design pieces: an animated button, a card layout, a colour palette, a screen shake for a game.
- Filter with the chips: New, All, Animations, Layouts, Palettes, Type, Game effects, and by platform Web, iPhone or Android. Search finds a piece by name.
- Click a piece to see it live. The tabs under it show the same piece for Web, SwiftUI, Compose, React Native and Game (Game Studio games).
- Update now checks for new pieces.
Put it in your site or app:
- Copy prompt copies a ready instruction you can paste into Neo's chat, or into any AI coding chat.
- Use in my project sends it straight to the chat for the project you have open (it asks you to Pick a project first if none is open).
- Copy code copies the code itself, for developers.
The buttons change to Copied when it worked.
Sketch
Draw the screen you have in mind. Sketch by hand, drop in ready parts, and change any part by writing what you want. Neo turns it into the real screen. Start a sketch for an iPhone screen, an Android screen, a Web page, or a game level (Top down action or Side view platformer or metroidvania). A game level sketch can become rooms in your game's Level flow.
Platformer room, draw it with a pen gives you a ruled paper page for one side view room. Draw the ground, gaps, platforms, ladders, spikes, coins, a start and an exit with the pen, the way you would on paper. What Neo sees shows each mark it read, one by one; fix one in its editor, then press Looks right. Pick the room's look: Game art (the default, polished pixel art with light, particles and sound), Drawn (your own strokes are the art) or Clean (tidy tiles and shapes). Build it shows the real steps as they happen (reading the drawing, laying out the ground, placing moving parts, painting the room, checking it plays); Neo then plays the room to the exit by itself and shows you the film.
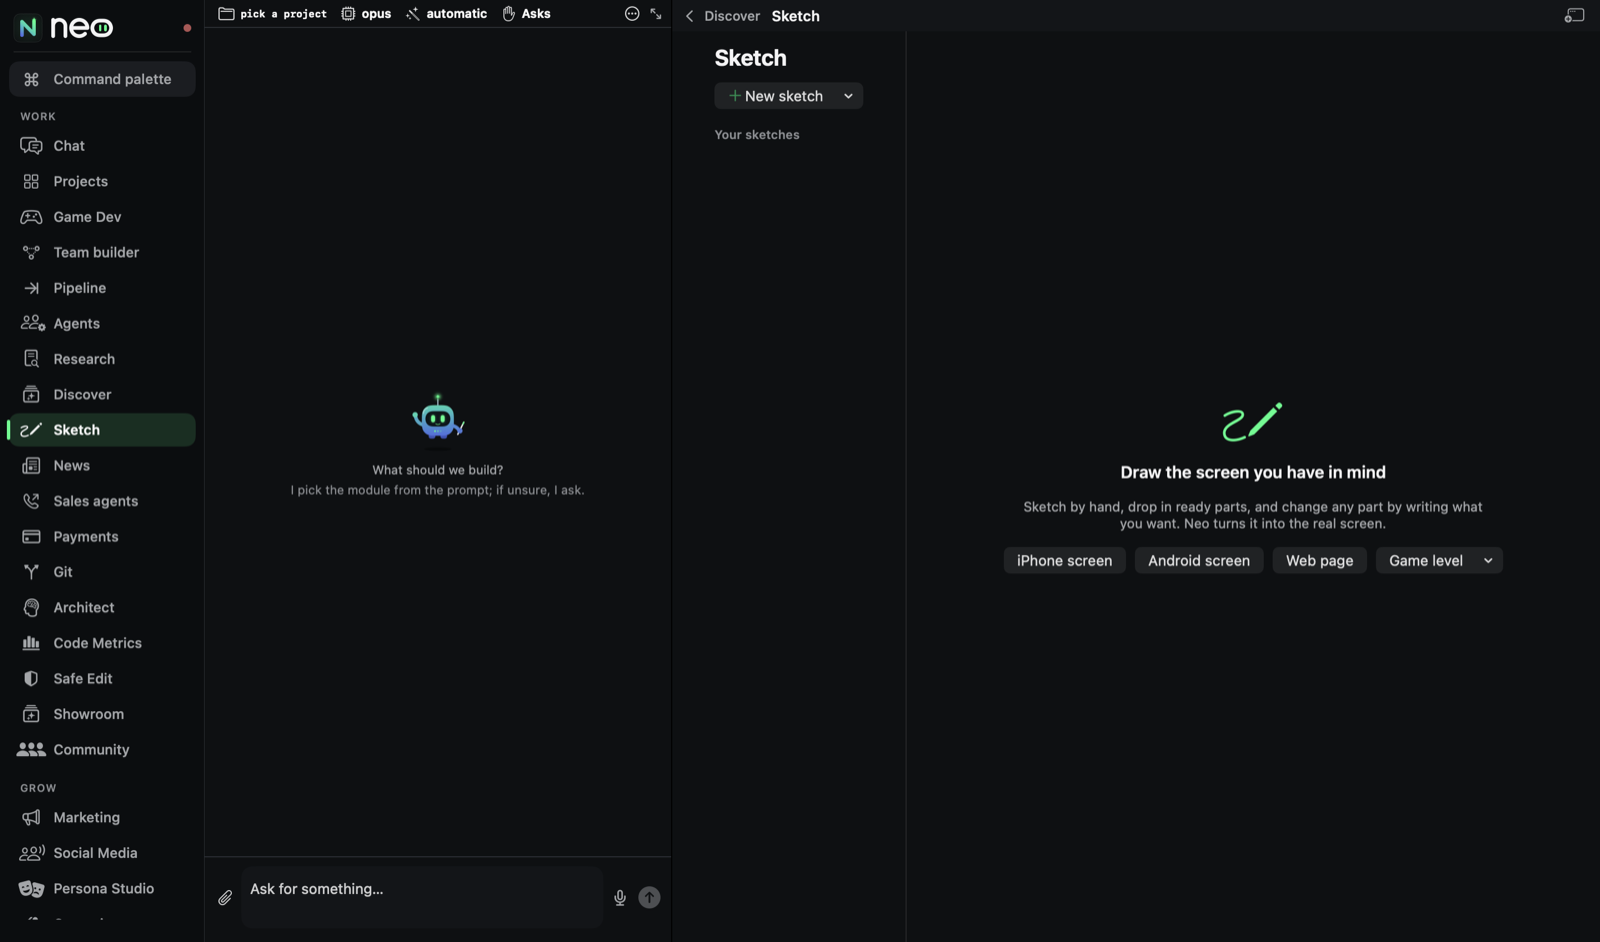
On the drawing page, the tools on the left draw with a pen, boxes, lines, arrows and text. Parts holds ready buttons, layouts and pictures to drag in. What Neo sees shows how Neo read your drawing; fix any part with Change it. Save keeps the sketch, and Build it hands it to the chat, which builds the real screen. Every sketch stays under Your sketches on the left, so you can pick one up later.
Showroom and Community
Both need Neo Cloud and come with the Solo and Pro plans. Without them you see See the plans.
Showroom (Apps people built with Neo). Tabs Discover, My apps and From the App Store. Share an app puts one of yours in the Showroom; Add your App Store apps brings in apps you already published. Neo looks at new apps before others see them, so a new entry first shows Waiting for review.
Community (Teams, prompts and setups people share, and help for each other). Filter by Everything, Teams, Prompts, Setups or Mine, and sort by Top, New or Most used. On a post: Use this team loads a shared team into your Team builder, Put it in the chat copies a prompt into the chat, Show me how asks for help, and Report flags something that should not be there. To share, pick A team I set up, A prompt or My setup.
News
What builders are talking about today, in plain words. Neo reads Hacker News, GitHub Trending, Product Hunt and Lobsters and explains the stories simply.
- Refresh gets the latest. Every morning adds a schedule that refreshes the page at 07:00 each day. Pressing it also switches on Run schedules; you can switch that off again on the Agents screen.
- On each story: Ask in chat to talk about it, or Research this to start a Research on it.
The Office
The Office is a small pixel art office where every agent Neo runs has a desk. It is what the canvas shows when no screen is open (close a screen with the back arrow at its top left).
- Everyone shows all agents; This project shows only the ones on your project.
- Each person shows what they are doing: working, need you, stopped or on a break.
- Click a person to Give them a task. They do it on their own, up to $1 and 30 minutes. Tick In project to keep it in your project, press Start, and follow it with Open in chat.
When nobody is busy it says Nobody is at work yet. Start something in the chat and they take a desk here.
The workspace: board, todos, flow and live preview
When no screen is open, the canvas is the workspace. The bar at its top switches between Office, Flow Editor, Kanban, Todos and Live Preview.
Kanban shows the selected project's cards in five columns: To Do, In Progress, Review, Done and Failed. Drag a card to move it. New Card adds one by hand, or ask the chat, for example add a card to fix the login screen. When the team works on a task, its cards show up here too. The pills at the top count the cards in each column.
Todos is your own list, apart from the team's board. Type a todo and press Add; it goes to the project picked on the left (or next to the box when All projects is picked). The list has In progress, Backlog and Done. Click a todo to edit it.
Flow Editor draws the selected project's agents as boxes. Click an output port, then another agent's input port, to pass work from one to the other. Click a box and choose Edit Agent to change its model and prompt; double click a line to remove it. The toolbar zooms, fits everything on screen, and has Save and Discard.
Live Preview runs the selected project. A website runs right on the canvas; for an iPhone or Mac app, Neo shows the simulator once the app is built and launched. The arrow reloads it after a change you asked for in the chat.
Agents and schedules
Agents on the rail shows every agent at work now and every agent on a timetable, with the controls to step in.
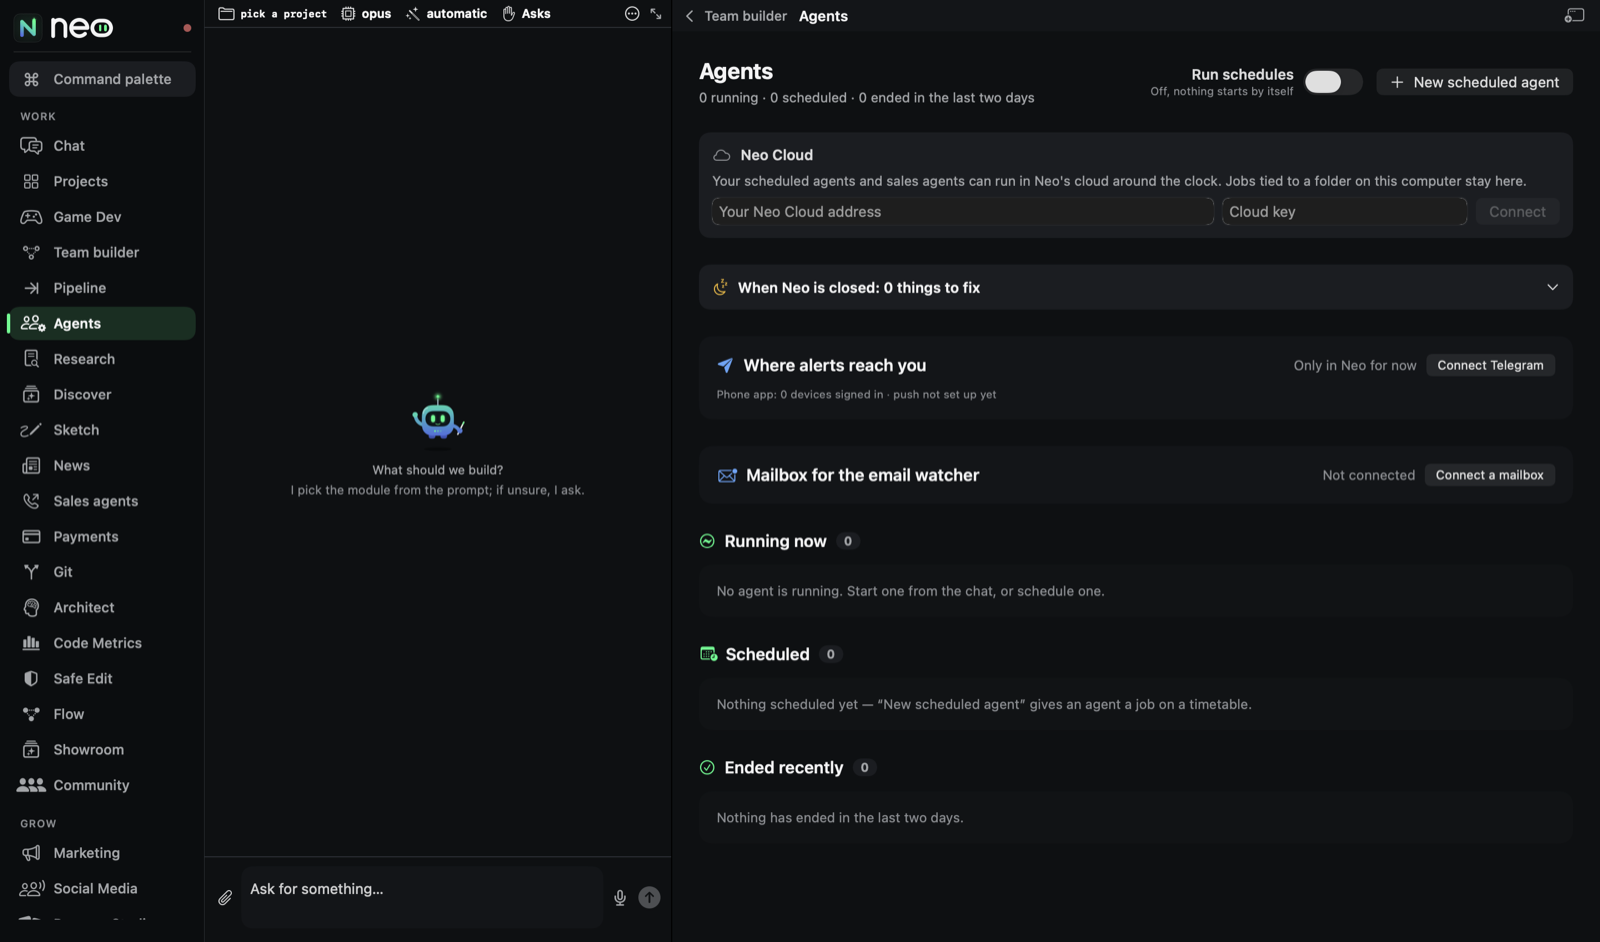
Run schedules is the main switch, and it is off by default: Off, nothing starts by itself. Turn it on and scheduled agents start on time. Nothing you scheduled (agents, research, the news) runs while it is off.
The screen has four parts:
- Running now: each running agent with Send now (give it a new instruction at once), After this turn (give it the instruction when its current step is done) and Stop.
- Scheduled: each schedule with its own on and off switch, Run now, Edit and Delete.
- Sent to you: reports agents sent you.
- Ended recently.
New scheduled agent opens the editor. Start from a ready job, or describe What it does, in plain words. Then set When (Every…, Daily or Once), the Model, the budget and the maximum minutes. A scheduled agent runs in Autonomous mode inside that budget and time. Neo only notifies you when it failed, or when its report starts with ATTENTION.
Neo Cloud. Scheduled agents and sales agents can also run in Neo's cloud around the clock, so they work while this computer sleeps. Press Connect, then Sync now. Beta.
Other screens on the rail
- Payments: take money in what you build, with Stripe or Lemon Squeezy checkouts.
- Git: every saved version of a project, what changed, and an optional online copy on GitHub. See Git.
- Architect: an AI reviewer that suggests improvements to a project. See Architect.
- Code Metrics: how big the project's code is and its longest files. See Code Metrics.
- Safe Edit: a snapshot before each task, and an optional OK step before every file change. See Safe Edit.
- Usage and Cost: what Neo's agents and paid tools have spent, by day and by job.
- Plans and Pricing: Neo's plans and what each one includes.
- Workers: other machines that can run Neo's jobs. For advanced users.
- Quick Start (from the Command palette, ⌘K): the fastest way to your first build.
Keys and model providers
Neo needs an AI model to think with. You choose which one, and you pay that company directly, for what you use. Neo never adds a charge on top of your model usage.
You have three ways to give Neo an AI, and you can mix them: your own API key (the main way), free models on this computer, and any other model provider that speaks the OpenAI chat API.
1. Your own API key (the main way)
An API key is a long secret code the company that makes the AI gives you, so Neo can use its AI as you. Claude comes from Anthropic, ChatGPT from OpenAI and Gemini from Google. OpenRouter gives you one key that reaches many models from many companies.
- On first launch, the Which AI should Neo use? page offers this. Later, open Settings, API Keys: the Your AI card has a row for Claude, ChatGPT and Gemini.
- Press the button on a row. A short card says what a key is, where to get it (Open the Claude Console, Open the OpenAI dashboard or Open Google AI Studio) and that the company bills you directly. An AI account, step by step shows every click.
- Paste the key under Paste your key here and press Check and save. Neo asks the company first (Checking…) and saves the key only when it works. You then see Connected with your API key; Use another key replaces it.
- OpenRouter (many models, one key) has its own card further down in Settings, API Keys. Neo uses a direct Anthropic or OpenAI key when you have one, and OpenRouter otherwise. In Settings, Models, OpenRouter (Cloud Open Models) has Browse Models to look through them.
- Gemini: you must be 18 or older, and in the EU, Switzerland and the UK Google needs its paid tier. On the free tier Google may use what you send to improve its products.
- Claude models appear as claude in the chat's model chip, ChatGPT's coding models as Codex.
What it costs. Before you pay anything, the What it costs card shows real numbers from projects built in Neo: a small website, a small mobile app, a small 2D or 3D game, and each change after that. For example, a small mobile app with Claude Sonnet comes to about $0.53 to $0.72. See every model compares the models, and How we measured says where the numbers come from. The card sits in Settings, API Keys and on the key card when you connect.
The company bills your key by use. A finished task ends with a line such as about $0.42 · Opus. Under Your AI, Spent on your API keys this month lists the month per project, and Monthly budget for Claude on your key makes Neo ask before a message that would go past it (leave it at 0 for no budget). Set a monthly spend limit on the company's site too, under Limits, so you never pay more than you plan to.
If you connected Neo another way before, Neo shows once what changed (for example Claude now connects with your API key) with Connect with API key and Later. Your projects and chats stay as they are. Gemini connects only with a key, which keeps your Google account safe.
2. Free models on this computer
Local models run on your own computer: free, private, and no account or key. On first launch, Free AI on this computer sets up Ollama: install the free Ollama app, open it once, then press Use it.
- Ollama: in Settings, Models, the Ollama (Local Models) card shows whether it is installed and running. Manage Models opens a list where you can Download a model, see your Installed Models, or delete one.
- LM Studio, MLX LM, llama.cpp server and Jan are ready presets under Model providers (see the next part).
Local models are free, but they are smaller than the big cloud models. They are good for chat and writing; for full app and game builds a cloud model on your own key usually does better.
3. Model providers (any OpenAI compatible server)
API keys and Connect at the bottom of the rail has a Model providers section: Any server that speaks the OpenAI chat API. Local ones are free and need no key. Cloud ones use your own key and bill your account.
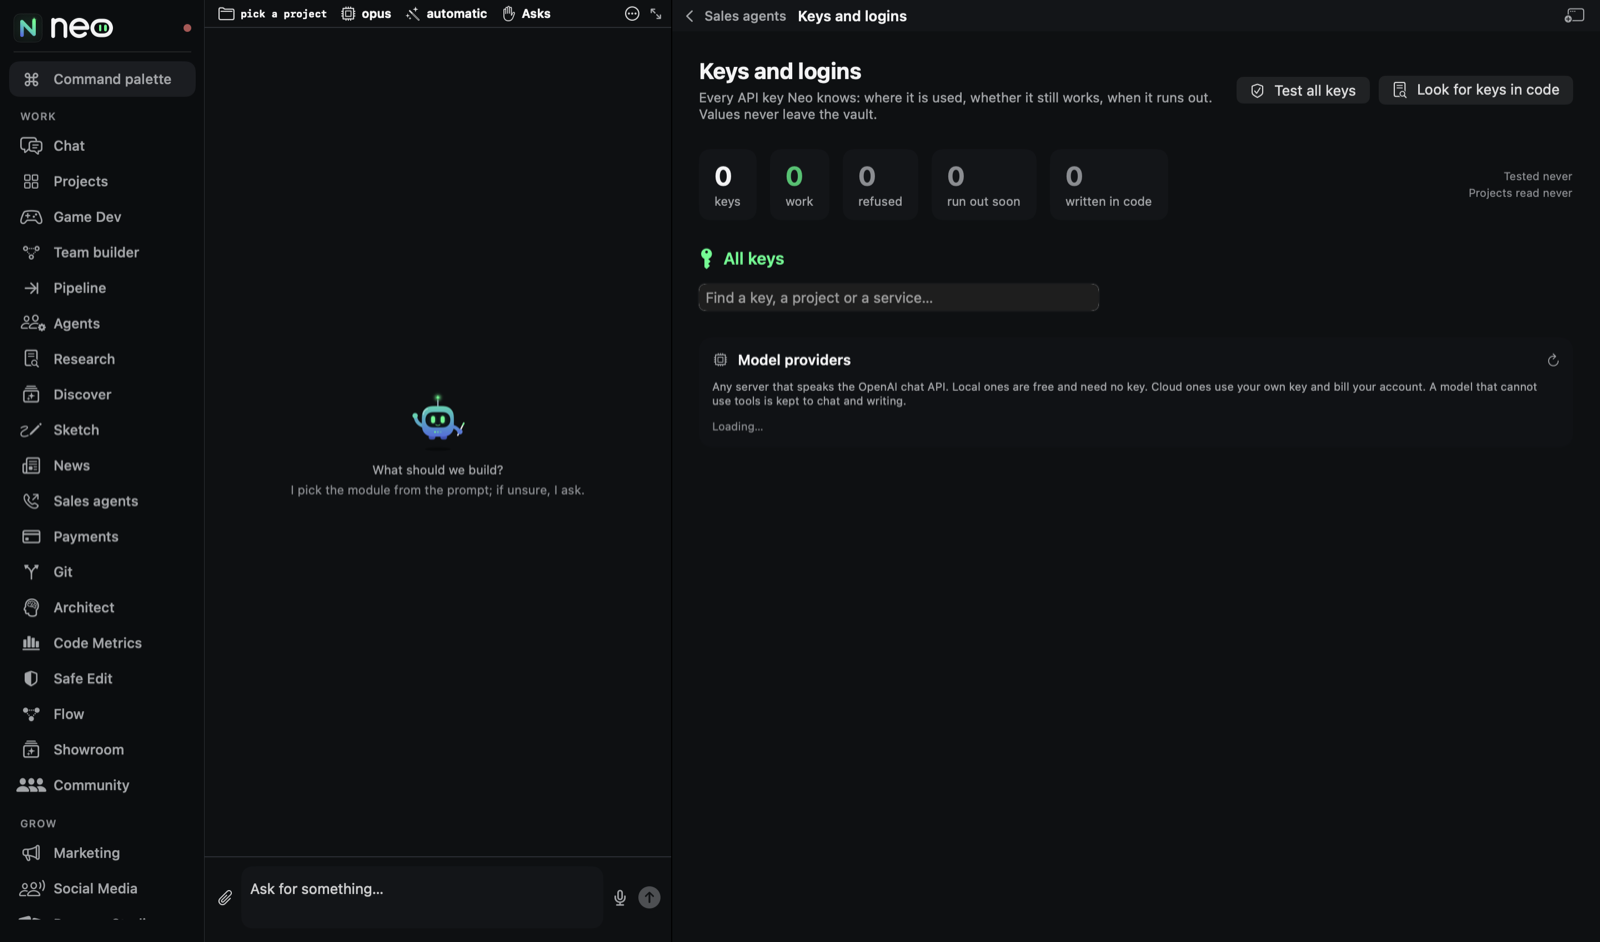
There are nine ready presets:
| Provider | Where it runs | Needs a key |
|---|---|---|
| LM Studio | on this computer | no |
| MLX LM | on this computer | no |
| llama.cpp server | on this computer | no |
| Jan | on this computer | no |
| DeepInfra | cloud | yes, your own |
| Groq | cloud | yes, your own |
| Together AI | cloud | yes, your own |
| Fireworks AI | cloud | yes, your own |
| Novita AI | cloud | yes, your own |
Press Set up on a row. You can change the Base URL (the presets fill it in), paste the API key for a cloud provider (Get a key opens its site), and name a default Model. Tool use decides whether these models may use Neo's tools: As the provider says, On, the models take tools, or Off, chat and writing only. Press Test connection, then Save. Forget removes the provider. Local providers have a Download button for the app itself.
The row then shows how many models it found, or not connected. Its models appear under Your model providers in the chat's model chip.
Your other API keys
Besides your AI, paste other keys in Settings, API Keys. Each card shows Configured or Not set, with Save and Remove. The cards include OpenAI, Claude (Anthropic) and OpenRouter (many models, one key), plus keys for picture, video, voice and 3D services (for example ElevenLabs, Meshy, Runway, fal.ai) and hosting (Vercel).
How to get your keys → opens the Setup Guide page that shows where each key comes from.
Your keys are stored encrypted by Neo's engine on this computer and never sent anywhere else. Each provider bills you directly.
Recommended models and smaller models
The chat's model chip marks the model we recommend for the work you are doing with a star: Recommended for games (Claude Opus), Recommended for apps, Recommended for websites (Claude Sonnet), and so on. You can still pick any model you like; Neo never stops you.
When you pick a model that is smaller than the work usually needs, for example a 7B or 8B model in LM Studio or Ollama building a game, a short note shows under the message box: This is a smaller model. For games we recommend Claude Opus 5.5; with this one you may not get the result you want. Press Use Claude Opus 5.5 to switch, or close the note to keep your model. It comes back only when you pick another smaller model.
Why it matters: a small model running on your computer has much less room to plan, write and check many files at once, so a whole app or game often comes out unfinished or broken. It works well for writing, short answers and small edits. We keep working to get the same results from smaller models that need less from your computer.
When you reach your budget
Your own API key has no usage limit from Neo: the company's spend limit and Neo's budget keep the cost in check. When a message would go past your Monthly budget for Claude on your key, the chat does not just send it. A card says This message may pass your monthly Claude budget, with about what the message costs and what you have used this month, and offers Send anyway or Not now.
- Raise the budget in Settings, API Keys, under Your AI, or leave it at 0 for no budget.
- On Autonomous, the budget on the chat's chip stops a task cleanly after the current step when it is used up. See Long chats and what they cost.
- A free local model is always an option: pick it in the chat's model chip.
Neo always asks first, and it never uses anyone else's key.
The API keys and Connect screen
Besides model providers, API keys and Connect lists every API key Neo knows: where it is used, whether it still works, and when it runs out. The tiles at the top count your keys, the ones that work, the ones a provider refused, the ones that run out soon and the ones written in code. Test all keys checks them; Look for keys in code finds keys written into your projects' code, which should not be there. Under All keys, Paste new on a key takes its replacement: Neo tests it first, and nothing changes if the provider refuses it. Values never leave the vault.
Settings
Open Settings with All settings at the bottom of the rail. The list on the left has one page per subject. Every page has a short tour the first time you open it; the ? in the bar above replays the tour of the page you are on.
Account
Who is signed in, with Sign Out. Current Plan and Credits Remaining show your plan; during the beta Neo runs on your own keys, so there is nothing to buy from Neo. Language switches the app to one of 10 languages; it asks to restart.
Appearance
- Appearance: System, Dark or Light. System follows the computer's own setting.
- Projects folder: where new projects go (for example
~/Neo Projects). Change… picks another folder. - Chat details:
- Show technical details (every command and file) in the chat.
- Follow the work in the panel. Off (the default): the canvas stays where it is while you chat, and cards offer Open in panel. On: the canvas switches to the module as soon as a turn starts.
- Hide file paths (for screen recordings). Off: paths show from your home folder as
~/…, never with your user name. On: every path reads as (a file on this computer). Turn it on before you record or share your screen.
- Game Dev · Studio mode: Show studio tools for Game Dev. For advanced users.
- Feature tours: Reset tours shows every screen's tour again.
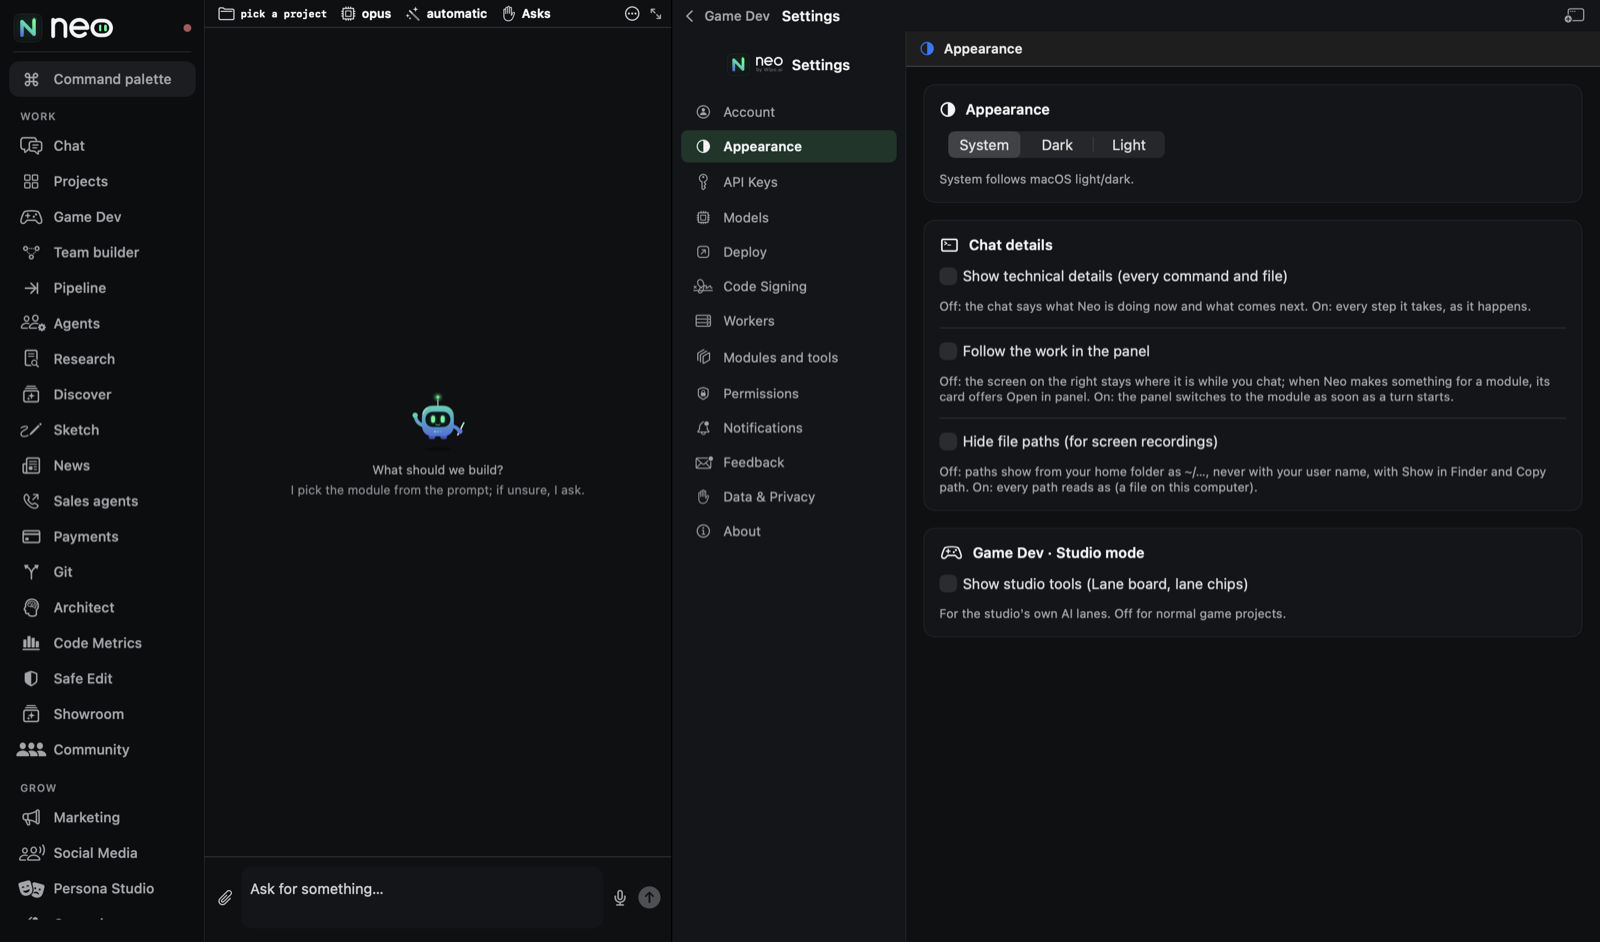
API Keys and Models
- API Keys: connect Claude, ChatGPT or Gemini with your own API key, see what your keys cost this month, set a monthly budget, and paste your other keys. See Keys and model providers.
- Models: Recommended Models (checked daily; Refresh checks now), Ollama (Local Models), OpenRouter (Cloud Open Models), Model providers and System Resources, which says how much memory this computer has for local models.
Deploy and Code Signing
Deploy keeps the accounts Neo uses when you publish, shared by every project. You only need the ones for where you publish, and Neo asks for an account at the moment a project needs it (Other accounts you may meet explains each kind): Apple (TestFlight), GitHub, Email Notifications (Resend, SendGrid or SMTP), hosts such as Netlify, Cloudflare Pages and Fly.io, backends, picture and 3D services, and game stores. Fill in what you use and press Save Credentials at the bottom. Neo uploads a build for you; publishing it in a store is still your click in that store.
Code Signing is only needed to put an iPhone or Mac app on a real device or in the App Store; trying apps in the iPhone simulator works without it. It needs a paid Apple developer account. Detect from Keychain finds your Apple signing identities; pick your team and press Save Team ID. Setup Keychain lets command line builds use the certificate; the password is used once and never stored.
Workers
- Server port: where Neo's engine listens on this computer. Automatic uses port 47800, or the next free port when another app has it. Choose Choose a port and Apply only if another app needs that port. It shows Running on port with the number in use.
- Enable Worker Mode lets another device run jobs for Neo. It is marked Coming soon in the beta.
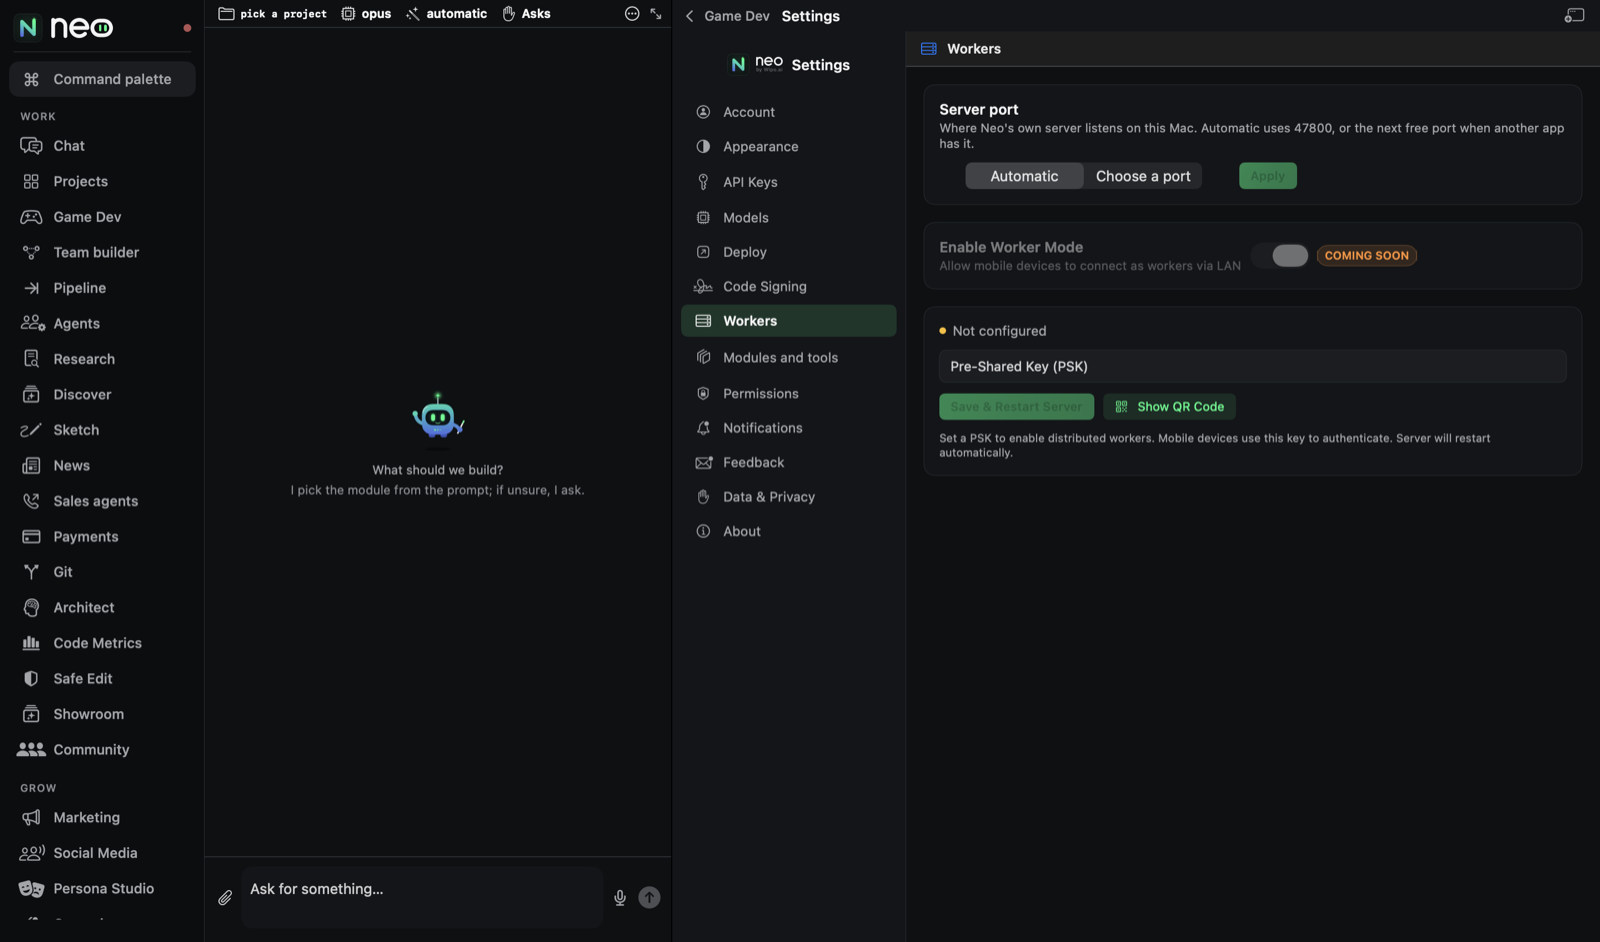
Modules and tools
Setup check (Check, Install, Reinstall) runs each tool your work needs once, such as the game engine. Tools Neo uses lists them with their size and why Neo needs them. Modules on the left hides rail items you do not use; a hidden module still works from the chat and the command palette. Show the Advanced group adds Agents, Team builder and Pipeline to the rail.
Permissions
What Neo may use on this computer (notifications, microphone, screen recording and so on), what each one is for and which part of Neo uses it. Allow asks for one. Neo works without any of them; each one only adds a feature.
Recordings
Press Record in the toolbar (or ⌘⇧R, or type "record this" in the chat) and Neo films only its own windows while you work: the main window and any screen you popped out. A small red Recording pill shows the time, with Pause and Stop. The first time, Neo says why and macOS asks once for Screen Recording. After Stop, Neo makes a short film of how you made it: the waiting is sped up, what you did stays at normal speed, your requests can show as subtitles, and anything private (file paths, email addresses, keys, local addresses) is blurred. You get a 15 second cut and the full film, wide and tall, and the Share window opens with them.
Here you choose Stop by itself after (30 minutes by default), Keep at most (the oldest recordings go first), subtitles, the Made with Neo card and Neo's sound. The list shows each recording with Share 15 s, Share full film, Show in Finder and Delete. Recordings stay on this computer.
Notifications
Notify me when a task finishes tells you when a chat task that ran a while finishes, runs into a problem or stops, and when a task waits for your OK (an approval or a budget question), also while you work in another app. Each task gets its own notice, grouped by project, and a click opens the chat at that task. Choose where notices go: Notification Center (on by default; macOS asks once, press Allow notifications), Phone (the Neo phone app, on when a phone is connected) and Telegram (on once you set it up on the Agents screen). Only for tasks longer than sets the shortest task worth a notice, 2 minutes by default. A task that waits for your OK tells you after about 30 seconds; a short task you are looking at never notifies.
Notification Level: All, Important Only, Errors Only or Silent, and Sound. Remote Push (iPhone / Apple Watch) sends the same notices to your phone through the free ntfy app: turn on Enable remote notifications, scan the code with your phone, and press Send Test Notification.
Feedback, Data & Privacy, About
Plans & Pricing
Plans and Pricing at the bottom of the rail shows Neo's plans. During the beta it says Paid plans open at launch. During the beta every feature is free. Neo runs on your own keys until then. Once plans open, each card lists what it includes and the one you are on is marked Current. Payments, when they open, go through Stripe, and Terms and Privacy are linked at the bottom.
Privacy: what stays on your computer
Neo runs on your computer. Your projects, code, pictures, chats and keys stay there. They leave it only when you do something that needs them to:
- Your AI provider gets the parts of your project a task needs, because the model has to read them to work on them. With Claude, ChatGPT, Gemini or another key of yours, the request goes straight from your computer to that provider under their terms. With Ollama or another local model, nothing leaves your computer at all.
- Services you connect (an app store, a host, a social network, a phone service) get only what an action you approved sends them: a build, a site, a post, a call.
Neo itself talks to three Neo services, each for one job:
- The licence check. When you sign in to the beta, Neo sends your email so we can email you the code, with the app version, the macOS version, your region and time zone setting, and a random install ID. Each later check sends the licence and the versions. No projects, code or messages.
- Neo Cloud, only if you use it: Showroom, Community, and scheduled or sales agents you choose to run in the cloud. Only what you share or schedule goes there.
- Feedback, only when you send it: what you wrote, and the diagnostics you chose to attach. Keys, email addresses, file paths and your name are hidden first.
Optional, off unless you agree: on first launch Neo asks whether you want to help train Neo's coding model. If you agree, it records your task, the code Neo's agents wrote for it, and the build errors they fixed. Files Neo did not write are never read. In Settings, Data & Privacy you can Review & Change that answer, Export My Data, or Delete My Data (which also turns collection off).
Keep decisions on this computer. On: Neo routes your requests with its own rules and never sends your request text to a decision model. Off: the text may also go to that model in the background to measure a smarter router; it never changes what Neo does.
The full policy is at neotheapp.com/privacy.
Updates
Neo updates itself.
- Neo, Check for Updates… in the menu bar (right under About Neo) checks now. A window shows what is new and installs it.
- When a new version is out, a bar at the top of the window says New version (number) available with Update Now.
- Rarely, a fix is required to keep using Neo. Then you see Critical Update Required and Update Now.
Your projects and settings stay as they are when Neo updates.
Feedback
Tell us what is broken or missing. It goes straight to the Neo team.
Open it from Help, Send Feedback… in the menu bar, Settings, Feedback, or the Report button on an error message.
- Subject and Description: what happened, and what you expected.
- Category: Bug Report, Feature Request or General.
- Include the last error lines: helps us find the cause. Keys, email addresses, file paths and your name are hidden.
- Your email, if we may ask you about it (optional).
- Attach diagnostics: which screen you were on, recent error messages and the connection state. No API keys, no code, no file contents.
- Screenshots: up to 3.
Press Submit Feedback. You see Sent to the Neo team. Thank you. If you are offline it says Not sent yet. Saved on this computer. Press Try again now when you are back online.
Git and GitHub, for beginners
You can build everything in Neo without ever touching Git or GitHub. This part is for when you are curious, or when you want an online copy of your project.
What they are, in plain words
- Git keeps every saved version of your project, like an undo history that never forgets. Each saved version is called a commit, and the whole history is called a repository (or repo). It lives in your project's folder on this computer.
- GitHub is a free website that keeps a copy of that history online. Your work is backed up, you can open it from another computer, and you can share it with a developer if you ever want help.
Why Neo uses them
- So you can always go back. If a change breaks something, Neo (or you) can return to any earlier version.
- So nothing is lost. With GitHub connected, a copy of your project is safe even if this computer is not.
- For some free hosting. GitHub Pages can put a website online for free, and Vercel can publish straight from GitHub.
What Neo does by itself
- In projects Neo makes, it saves a version after each step it builds, with a note saying what the step did.
- Before every task, it takes a snapshot of the project, which you can restore from Safe Edit.
- It never sends anything to GitHub without asking you. Pushing (sending your versions online), publishing and making a project public always show a card first, and nothing happens until you press it. This is true in Asks and in Autonomous.
- When you do want to send your work online, ask in the chat: put this project on GitHub. Neo shows what it will do and waits for your OK.
If Git is not installed on this computer
Git is free. A new computer often does not have it yet. Neo checks for you, and the Git screen says Git is not installed yet with an Install Git button. Then:
- Press Install Git.
- On a Mac, Git comes with Apple's free command line tools, so Apple's own window opens. Press Install there and accept the licence. On Windows, Neo installs Git for you. On Linux, Neo shows the steps for your software app.
- Wait a few minutes (on a Mac it is a big download). Neo notices by itself when Git is in place; there is nothing to restart.
The same button is in Settings, Modules and tools.
If you chose to build websites, apps or games when you first opened Neo, it may have offered this already.
Step by step: a free GitHub account, connected to Neo
You need this only if you want an online copy. It takes about five minutes.
Step 1. Make a free GitHub account.
- Open github.com/signup.
- Type your email, make a password, and pick a username. The username shows up in your web addresses (like your-name.github.io), so pick something short.
- Solve the small puzzle, then type the code GitHub sends to your email.
- If GitHub asks which plan you want, choose Free. You can skip the questions about your team or what you will use it for.
The free plan covers everything Neo does, including private projects nobody else can see.
Step 2. Make a key for Neo. A key (GitHub calls it a personal access token) lets Neo use your GitHub account without your password.
- While signed in to GitHub, open github.com/settings/tokens/new?scopes=repo&description=Neo. This page already has the name Neo and the repo box ticked, which is all Neo needs.
- Set Expiration to 90 days.
- Scroll down and press Generate token.
- Copy the key right away. It starts with ghp_, and GitHub shows it only once. If you lose it, make a new one the same way.
Step 3. Paste it in Neo.
- Open Git on the left. The first time, a card explains what the screen is for.
- Press Connect (on the card or on the GitHub line). A small window asks for the key.
- Paste the key in GitHub key. Leave Project on GitHub, if you have one empty if you have no project there yet.
- Press Test & Connect. Neo checks the key with GitHub first and saves it only when it works. The line then says GitHub: @your-name.
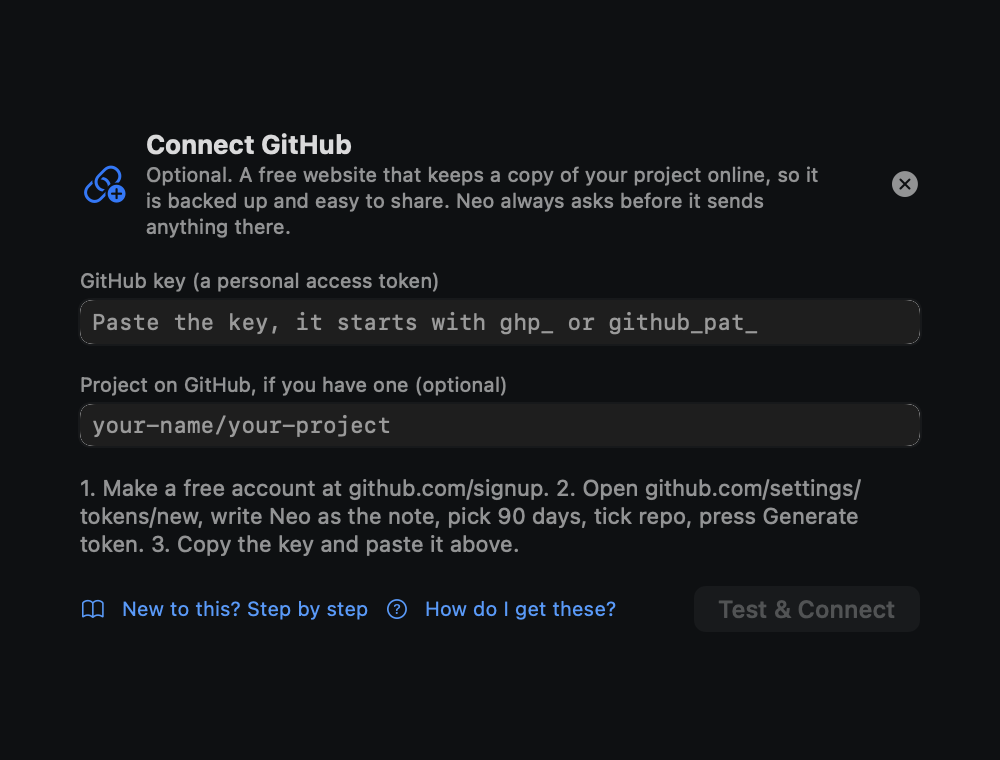
What changes after you connect. Nothing happens by itself. When you want an online copy, ask the chat put this project on GitHub and approve the card. Once the project is on GitHub, Push on the Git screen sends newer versions. When the key runs out after 90 days, the GitHub line says so: make a new key the same way and press Reconnect.
The Git screen in plain words
- Changes lists what changed since the last saved version. Staged means ready to go into the next version, Modified means changed, Untracked means new files. Stage All, a few words about what changed, then Commit saves a version. Commit & Push also sends it to GitHub.
- Branches are separate copies for trying an idea. The one marked current is where new versions go; main is the normal one.
- History lists every saved version, newest first. To go back, ask the chat: undo the change called Add the opening hours.
- Push sends your versions to GitHub and Pull brings in versions saved somewhere else.
When something goes wrong, the message under the branch name says what to do, like Press Pull first, then Push again.
Other accounts you may meet
Neo does most things on this computer with nothing to set up. A few jobs need an account with another company: the AI that thinks, a place to put a website online, a database for an app, a way to send email. You never need them all, and Neo asks for one only when a step needs it.
Account, key, token: what is the difference?
- An account is your sign in with that company. Most have a free plan.
- A key (also called an API key or a token) is a long secret code the company gives you inside your account. Pasting it in Neo lets Neo use the service as you, without your password.
- Treat a key like a password: do not post it or send it to anyone. Neo keeps keys encrypted on this computer and never shows them again after you save them. If a key leaks, delete it on the company's website and make a new one.
An AI account, step by step
You need one way for Neo to think: your own API key from one AI company. Make a key with one of them:
| Company | Where to sign up | Where the key is | It starts with |
|---|---|---|---|
| Anthropic (Claude) | console.anthropic.com | Billing: add a payment method. Then API Keys, Create Key | sk-ant- |
| OpenAI (ChatGPT) | platform.openai.com | Billing: add credit. Then API keys, Create new secret key | sk- |
| Google (Gemini) | aistudio.google.com | Get API key, then Create API key. A free tier is included | AIza |
| OpenRouter (many AIs, one key) | openrouter.ai | Credits: add credit. Then Keys, Create Key | sk-or- |
Then paste it in Neo:
- Open Settings, API Keys.
- Under Your AI, press the button on the row for Claude, ChatGPT or Gemini (for OpenRouter, use its card further down) and paste the key under Paste your key here.
- Press Check and save. Neo checks the key with the company and shows Connected with your API key when it works. If the company refuses it, Neo does not save it and says so.
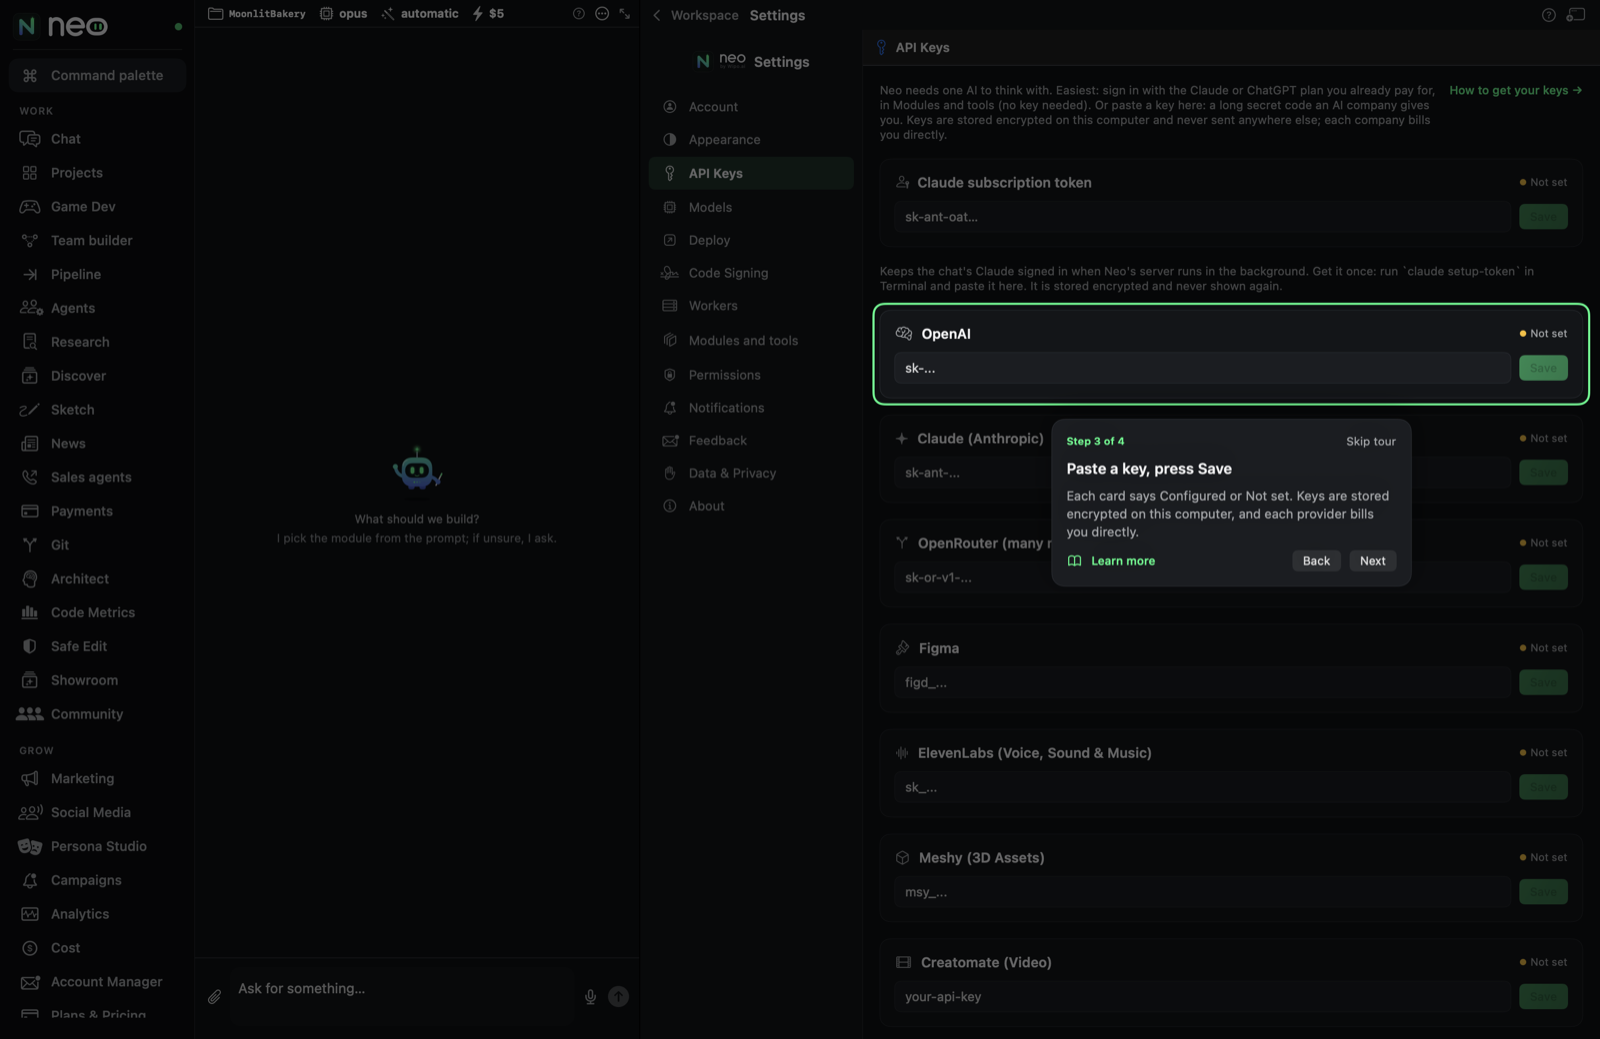
The company bills you directly for what you use. Set a monthly spend limit on its site (Anthropic and OpenAI call the page Limits) so you never pay more than you plan to. Neo shows about what each task cost, shows the price of paid steps before it runs them, and the budget on the chat's Asks or Autonomous chip caps each request. A free alternative is a local model (Ollama), set up in Settings, Models.
Putting a website online (hosting)
Neo shows every site on this computer first. Putting it online is a separate step you approve. The first time, Neo asks for an account with a hosting company and shows exactly what to paste:
- Vercel (free plan, the default). Sign up at vercel.com with your email or your GitHub account. Open Account Settings, Tokens, press Create, name it Neo and copy the token. Paste it in the card Neo shows, or in Settings, API Keys, Vercel. Your site gets a free address like moonlit-bakery.vercel.app.
- Cloudflare Pages (free plan). Sign up at dash.cloudflare.com, make an API token (My Profile, API Tokens, Create Token) with the permission Cloudflare Pages, Edit, and copy your Account ID from the right side of the dashboard. Neo asks for both.
- GitHub Pages (free). Needs only the GitHub account from the GitHub steps above.
You can keep your own address (a domain, like moonlitbakery.com) for later; the free address works right away.
A place to save your app's data (Supabase)
When an app needs accounts, a preorder list or saved recipes, it needs a database. Neo uses Supabase, which has a free plan.
- Sign up at supabase.com (your GitHub account works too) and press New project. Pick any name and a strong database password, and keep the region Supabase suggests.
- Open supabase.com/dashboard/account/tokens and press Generate new token. Name it Neo and copy it (it starts with sbp_).
- Your project ID is the short code in the project's address, the part before .supabase.co.
- When Neo's build card asks for Supabase access token and Supabase project ID, paste them there. Neo makes the tables and the access rules by itself.
Sending email (Resend)
For campaign emails and daily reports, Neo uses Resend (free plan): sign up at resend.com, open API Keys, press Create API Key and copy it (it starts with re_). Paste it when Neo asks, or in Settings, Deploy, Email Notifications.
Other services
Pictures, video, voices, phone calls, ads and the app stores each use their own account. Help and setup at the bottom of the rail has a page for each one with the steps, and Neo tells you the moment a project needs one. Apple's App Store needs a paid Apple developer account (99 USD a year); everything else in this part has a free plan to start with.
Three worked examples
Each example uses only the chat. Copy the messages as they are, or change the details to fit your idea.
Example 1: a website
Goal: a one page site for a small bakery, live on the internet.
- In the chat, send:
Make a website for Sunrise Bakery, a small family bakery. One page with our story, a menu with prices, opening hours, a map link and a contact form. Warm colours, friendly and simple. - A choices card appears. Neo suggests a static site, a look and the sections. Check the Sections group (tick Call me if you want people to ask for a call back), then press Build this.
- Watch the step list. The site appears in the Product preview on the right.
- Refine it in plain words:
Make the menu two columns and add a photo of fresh bread at the top. - When you like it, publish:
Publish the site on Vercel.You get an approval card: Publish Sunrise Bakery to Vercel? This makes the site public. Press Approve. The card shows Published. and Open site.
You need: an AI model. To publish, a free Vercel, Netlify or Cloudflare account (the choices card asks for it if it is missing).
Example 2: an iPhone app
Goal: a simple habit tracker that runs in the iPhone simulator.
- Send:
Make an iPhone app called Tiny Steps for tracking daily habits. I add a habit, tick it off each day, and see my streak. Calm green colours, a clean look, and a small reminder each evening. - On the choices card, check Runs on (iPhone or iPhone + iPad) and Features, then press Build this.
- Neo plans the screens, writes the app, builds it and opens it in the iPhone simulator. It films a short test run you can watch in the card.
- Ask for changes:
Add a dark mode and let me reorder habits by dragging. - Later, when you have an Apple Developer account:
Prepare the App Store page and keywords for Tiny Steps.
You need: an AI model, and Xcode from the Mac App Store (free). Help and setup checks it for you. To publish, an Apple Developer account.
Example 3: a 2D game
Goal: a small pixel art platformer you can play.
- Send:
Make a new game called Moss Valley: a 2D pixel art platformer. A small fox runs and jumps through a forest, collects glowing seeds and reaches a shrine at the end. Five short rooms, gentle music. - Neo makes the game project, a concept, the hero and the first rooms. Open Game Studio to follow along, or press Open in panel on the card.
- In Game Studio, open Pipeline. You see the steps from Concept to Publish and which are done. Click a Ready step and press Run to make it next.
- Open Level flow to see the five rooms. Drag them around, or click a room to change What happens here or its Intensity.
- Open Play & test and press Play. If Last run shows errors, tell the chat:
Fix the errors from the last play test. - Make it yours:
Give the fox a double jump in the third room and make the shrine glow.
You need: an AI model, and the game engine. Neo downloads the game engine by itself the first time it builds a game; you can also install it in Settings, Modules and tools. Paid art tools (like PixelLab) are optional and always ask first; the free way uses your AI model.
FAQ
Do I need to know how to code? No. You describe what you want and make choices on cards. The code is there if you want to look, but you never have to.
What does it cost? Whose account pays? Neo's own plans are listed on Plans and Pricing at the bottom of the rail. The AI work itself is paid by the company whose AI you connected:
- Claude, ChatGPT and Gemini run on your own API key, and that company bills your account for what you use. Neo shows about what each task cost, and a monthly spend limit on the company's site caps it.
- Paid tools such as picture, video or voice services bill your account with them. Neo shows the cost and asks before each paid step (or keeps within your budget in Autonomous mode).
- Local models are free. Ollama, LM Studio, MLX LM, llama.cpp and Jan run on your computer and cost nothing.
Usage and Cost at the bottom of the rail shows what Neo's agents and tools spent, by day and by job.
Do I need an API key? For the best results, yes: your own API key from Anthropic (Claude), OpenAI (ChatGPT), Google (Gemini) or OpenRouter is the main way to connect. The What it costs card in Settings, API Keys shows what a small website, app or game really cost in Neo, so you know before you start; a small mobile app with Claude Sonnet comes to about $0.53 to $0.72. Without a key, free local models such as Ollama or LM Studio run on your computer at no cost.
Does Neo work on Windows or Linux? The Neo app is for the Mac today. A Windows version is coming soon. On Linux, the Neo command line tool works today. Neo can already build games for Windows and Linux from your computer.
Can Neo publish my game on PlayStation, Xbox or Nintendo Switch? Console support is ready, needs the platform's licence. Neo can prepare the game and a submission draft, but each console maker only lets approved developers build and publish, under their own agreement. Neo does not publish to consoles directly. Steam, itch.io, the web, the App Store and Google Play work with your own accounts there.
Will Neo post, publish or spend anything without asking? No. Publishing, posting, emailing and calling always wait for your Approve. Paid steps also ask in Supervised mode; in Autonomous mode they run only within the budget you set.
Where are my files? In the project's folder on your computer. Open Projects, pick the project, press Show in Finder. See Projects.
Can I use Neo offline? With a local model (Ollama, LM Studio and the like), yes for chat and building. Anything that talks to the internet (cloud models, publishing, research) needs a connection.
Is my code used to train AI? Only if you agreed on first launch, and only the code Neo's agents wrote for you. You can change your answer or delete what was recorded in Settings, Data & Privacy. See Privacy.
What does Beta mean in this guide? The feature works, but it is new and may change. Tell us how it goes with Help, Send Feedback….
Troubleshooting
When something goes wrong, Neo shows a problem card instead of a raw error: what happened, what to do now, and one button such as Try again, Sign in, Open settings or Ask Neo to fix it. Details holds the technical text, with Copy if you want to send it to us.
"Couldn't reach Neo's server" or the dot next to the logo is red. Neo runs a small engine on your computer, and the screens talk to it. Right after you open Neo it needs a few seconds to start. When it is busy with a big job it can also be slow to answer for a moment. Wait a little and press Try again. If it stays red, quit Neo and open it again. Your work is saved.
"Server busy" or a turn seems stuck. Press Stop on the running turn; it stops after its current step. Messages you send meanwhile wait as Queued. If another app uses Neo's port, go to Settings, Workers, Server port and leave it on Automatic, which picks a free port.
A word in Neo means nothing to you. Look it up in Words you'll see, or ask the chat what is a repository?
Neo asks for an account or a key you do not have. Other accounts you may meet explains each kind, what it costs and the steps. For GitHub, see a free GitHub account, connected to Neo.
The Git screen says Git is not installed. See If Git is not installed: Apple's free command line tools, installed from Settings, Modules and tools.
The model is not connected, or the chat cannot answer. Check the model chip above the chat box. Then:
- For Claude, ChatGPT or Gemini, open Settings, API Keys and check that the row under Your AI says Connected with your API key. If the company refused the key, make a new one on its site and press Use another key. Also check that the account has credit and has not reached its monthly spend limit.
- For a model provider, open API keys and Connect, press Set up on the row and Test connection. A local app (LM Studio, Jan and so on) must be open and its server started.
- For Ollama, Settings, Models should say how many models are available, not Ollama not running.
The iPhone simulator does not open, or the app build fails. iPhone and Mac apps need Xcode from the Mac App Store. Open Xcode once after installing it so it can finish setting up, then try again. The first build of a new app takes a minute or two. Help and setup shows whether Xcode and the simulator are ready.
The game engine is missing (Play & test says it is not installed yet). Neo downloads the game engine by itself the first time it builds a game. To install it now, press Install game engine in Play & test, or go to Settings, Modules and tools and press Install next to Game engine. Help and setup (Help, Neo Setup Guide) also lists what is missing on its game pages, with a button to the right place.
A game is not set up to play yet. In Play & test, press Create and open it, or ask the chat to build the game.
A project I added from somewhere else does not open everywhere. When you add a project with Add a project you already have, Neo looks at the folder first and says under What Neo can do with it today and Not yet what will work. A game made with a different game tool, or an app made with a toolkit Neo does not build with yet, can still be read, changed and talked about with Neo, but its levels, map, screens or store builds may not open. Your folder is never copied or moved.
The code email did not arrive. Look in your spam folder for an email from hello@wipoai.tech. Wait 30 seconds and press Send a new code. Codes work for 15 minutes.
Something else. Use Help, Send Feedback… and tick Include the last error lines and Attach diagnostics. They help us find the cause without seeing your code or keys.
Something missing or unclear? Use Send Feedback in the app, or write to hello@wipoai.tech.